A leaning sheet pile wall leaks, binds, and costs money. After ten years supplying steel sheet piles from our factory, I can tell you that vertical accuracy decides profit more often than price does.
You ensure vertical accuracy during sheet pile driving by combining four controls: a rigid guide frame, a properly aligned hammer and leader, a slow and careful first metre of driving, and constant plumb checks in two directions. Correct any tilt while the pile head is still within reach, because deep corrections are slow and expensive.
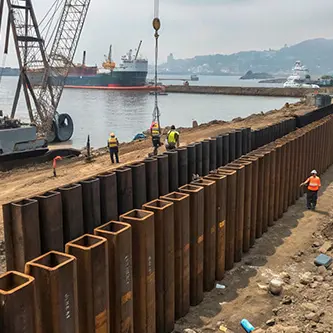
In this guide, I will walk you through the whole topic the way I explain it to contractors who buy from us in the Middle East, Africa, and Australia. We will look at why verticality matters so much, what pushes piles out of line, how guide frames work, which driving method gives you the best control, and how to correct a pile before the tilt locks in. If you are new to installation itself, start with our step-by-step installation process guide first, then come back here.
Why Does Vertical Accuracy Matter in Sheet Pile Driving?
Small tilts look harmless on day one. Then the wall refuses to close, the interlocks open, and the excavation starts to weep water at the corners.
Vertical accuracy matters because a tilted sheet pile wall loses interlock grip, gains water paths, and drives the next piles even further off line. Most project specifications allow a maximum tilt of about 1:100, and a wall driven beyond that often needs re-driving, sealing, or a redesign.
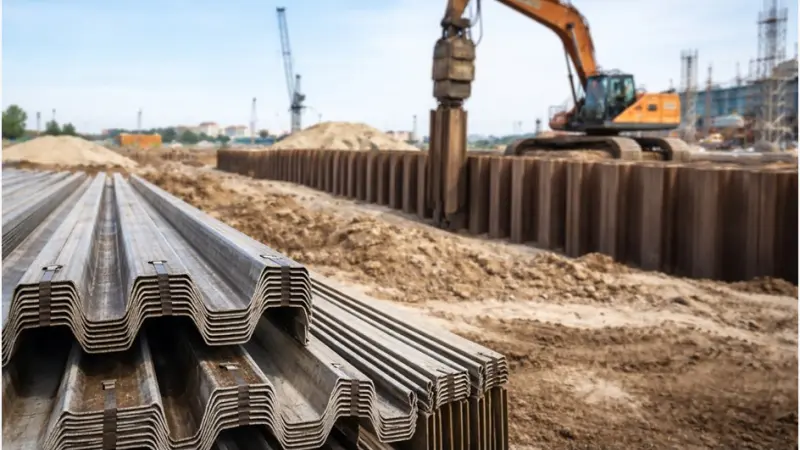
What actually goes wrong when a wall leans
The first problem is geometric. A sheet pile is a long flexible beam, and each new pile follows the line of the interlocks it grips. When pile number five tilts one degree, pile number fifteen wants to tilt more, not less. The error compounds along the wall. I have seen a quay wall in the Gulf drift more than 300 millimetres out of position at the far end because nobody corrected a small lean near the start.
The second problem is water control. Interlocks are designed to grip and seal under soil pressure. When the wall twists, the interlocks open up, and water finds a path. In a cofferdam, that path turns your dewatering budget into a running cost for the whole project. In a basement wall, it turns into complaints from the client’s neighbours.
The third problem is structural. A tilted wall does not carry load the way the designer calculated. The earth pressure acts on an inclined face, the bending moments shift, and the effective embedment drops on the low side. The structural reserve you thought you had quietly shrinks.
| Problem | Why it happens | What it costs you |
|---|---|---|
| Wall drifts off the design line | Compounding tilt from pile to pile | Re-setting head, trimming capping beam |
| Interlocks open and weep water | Twist and tilt open the clutch | Extra sealing, higher dewatering bills |
| Reduced structural capacity | Bending and embedment no longer match design | Engineer review, possible redesign |
| Pile refusal and driving damage | Toe binds as tilt grows | Damaged piles, lost driving days |
What Causes Sheet Piles to Go Off-Vertical During Driving?
If you know the causes, you can prevent most tilts before the hammer even starts. This is the section I wish every site foreman would read.
Sheet piles go off-vertical because of hammer and leader misalignment, driving too hard before the pile grips, missing or loose guide frames, buried obstructions, soft ground on one side of the rig, and grabbing interlocks that pull the new pile sideways. Most causes are visible before the first blow, so most tilts are preventable.
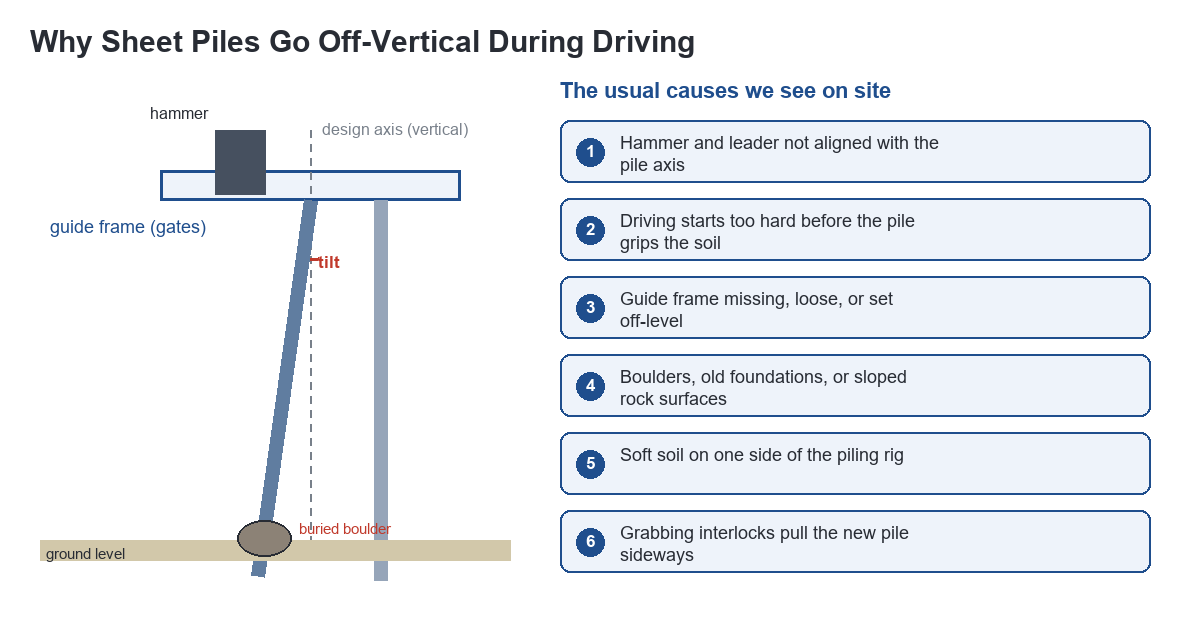
Six causes I see again and again
Cause one is the hammer. If the hammer and its leader are not set plumb, every blow pushes the pile a little off axis. Cause two is the start. When an operator opens the throttle on a pile that has not yet gripped the soil, the pile wanders in the gates like a loose fence post.
Cause three is the guide frame. Without stiff, level gates, the top of the pile has nothing to lean against, so it takes whatever line the first blows give it. Cause four is the ground. Boulders, old foundations, and sloping rock deflect the toe, and the deflection shows up at the top as a lean in the opposite direction.
Cause five is the rig platform. A crane or rig parked on soft, uneven soil tilts its whole mast, and every pile inherits that tilt. Cause six is the interlock itself. In dense soils, the leading pile grabs the clutch of its neighbour and drags it along, which leans the wall like a row of falling dominoes.
| Cause | How you notice it | Prevention |
|---|---|---|
| Hammer/leader misalignment | Plumb bubble off before first blow | Check leader plumb on every set-up |
| Hard start before grip | Pile wanders in the first metre | Ease the throttle, let the pile bite |
| Loose guide frame | Gates rock or shift under load | Bolt and wedge gates tight, check level |
| Buried obstruction | Sudden toe deflection, refusal | Pre-auger or probe the line first |
| Soft rig platform | Track or outrigger settles | Mats and pads under the whole set-up |
| Grabbing interlocks | Wall leans toward driven side | Drive in pairs, alternate the panel |
How Do Guide Frames Keep Sheet Piles in Line?
The guide frame, sometimes called waling or template gates, is the cheapest verticality insurance you can buy. In my opinion, no serious wall should be driven without one.
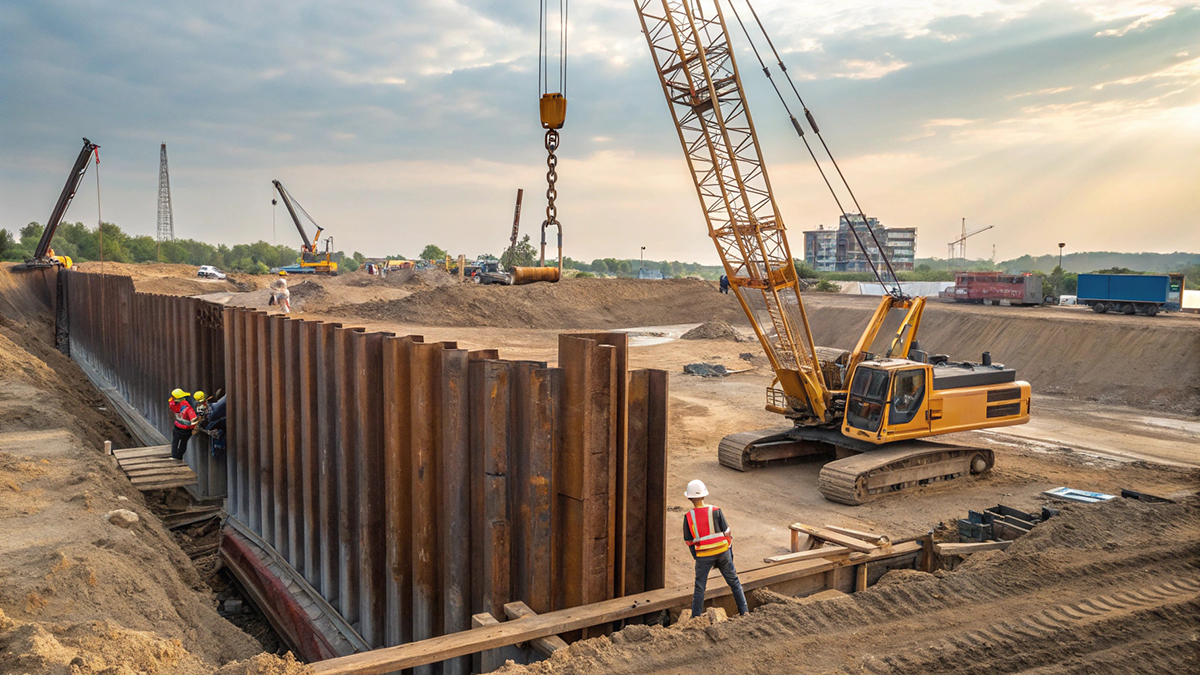
A guide frame keeps sheet piles in line by holding the tops of the piles in a fixed, level, two-directional position before and during driving. Piles can only wander at the toe, and the frame gives you a straight, plumb reference that the hammer and crew can check against at any moment.
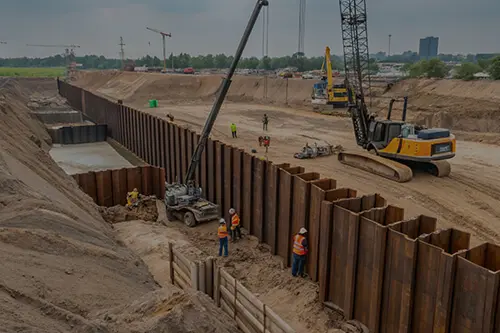
Design the frame for two levels, not one
A single-level frame near the ground is common, and it is a mistake on tall piles. Steel sheet piles are flexible beams. A pile held only at the bottom can bow at mid-height and lean at the top, and you will not see it clearly until the gates are gone. The better practice is a two-level frame: one gate near the existing surface and one near the top of the piles, usually around two metres below the capping position.
The frame also sets the wall line. Weld or bolt a straight edge along the gate, and every pile has a visible target for both position and plumb. On long walls, I always ask contractors to check the frame with a survey instrument, not just a spirit level. A frame that is level but 50 millimetres off line will give you a beautifully vertical wall in the wrong place.
Finally, the frame controls panel driving. When you drive pairs or panels through stiff gates, the piles support each other and the interlocks stay tight. That is exactly the environment where vertical accuracy comes easy.
| Frame feature | What it controls | My minimum rule of thumb |
|---|---|---|
| Two gate levels | Top and mid-height plumb | Second gate at 2 m below pile top |
| Straight wall line on gate | Position along the wall | Survey check, not just a level |
| Stiff horizontal wales | Resists driving loads | No visible flex under hammer blows |
| Panel width control | Interlock grip and sealing | Drive in pairs or small panels |
Which Driving Method Gives the Best Vertical Control?
Contractors ask me this before almost every export order, because the answer changes the equipment they hire.
Vibratory driving with a good leader gives the fastest driving with acceptable vertical control, while impact hammers give you the strongest feedback and press-in methods give the finest control of all. The best choice depends on your soil, your noise limits, and how strict the verticality specification is.
Compare the methods before you hire the rig
Vibratory hammers are the workhorse of our export projects. They are fast, and the vibration actually settles the pile into a plumb line in loose and medium soils. The weakness is stiff ground: when the pile stops taking penetration, crews are tempted to push harder, and a hanging hammer on a leaning pile makes everything worse.
Impact hammers are slower but honest. Each blow gives you a clear signal, and a well-maintained helmet and leader keep the blow aligned with the pile axis. For hard driving and long piles, I still prefer an impact hammer hanging from a proper piling leader over a free-hanging rig.
Hydraulic press-in machines are the premium option for control. They push the pile in with steady force, react against adjacent piles, and record the force for every metre. If you are working beside a railway or a hospital, or your specification is strict, a press-in system is worth the mobilization cost. For a full comparison, see our vibratory vs impact driving guide.
| Method | Vertical control | Speed | Best ground | Watch out for |
|---|---|---|---|---|
| Vibratory (leader-guided) | Good | Fast | Sands and soft clays | Stiff soil pushes crews to force it |
| Impact hammer | Good to very good | Medium | Dense soils, long piles | Noise and vibration limits |
| Press-in (silent) | Excellent | Slow | Most soils above rock | Needs reaction piles and space |
| Drop hammer (free) | Poor to fair | Slow | Small remote jobs | No leader, no control, damage risk |
How Do You Correct a Sheet Pile That Starts to Tilt?
Tilts happen even to good crews. What separates a professional site from a messy one is when the correction happens.
Correct a tilting sheet pile while the head is still within reach of the gates: ease the driving, pull the top back toward plumb with the hammer or a winch, and re-drive slowly with the leader set slightly against the lean. Once the pile is more than a few metres in, plan an extraction and reset instead of forcing it deeper.
Correction options, stage by stage
In the first metre, the pile is still loose in the soil. Stop driving, check the leader plumb, and re-start slowly with the hammer aimed slightly against the lean. Most tilts die here if your crew is watching.
Between one and three metres, the toe has grip, and simple re-aiming is not enough. You can attach a pulling line or winch at the top, or use the hammer itself as a weight swung against the lean, while re-driving in short, soft blows. On paired piles, drive the leaning pile’s partner first and let the interlocks pull it back.
Beyond three metres, forget pushing. A pile deep in dense soil will not bend back without damage. Pull it with a vibratory extractor and start again, this time with the gates tightened and the start slowed. I know extraction feels like defeat, but re-driving a crooked pile that binds and splits at the toe costs more than pulling it. If refusals and obstructions keep pushing you into this situation, our article on common construction challenges covers the recovery playbook in detail.
| Stage of driving | What correction works | What to avoid |
|---|---|---|
| First 1 m | Re-aim hammer, slow soft blows | Forcing the throttle to push it back |
| 1 to 3 m | Winch or hammer pull against lean, re-drive | Long hard blows that bend the pile |
| Deeper than 3 m | Extract and reset with tight gates | Trying to force the pile deeper |
| Whole panel drifting | Re-check frame line and rig platform | Correcting pile by pile without a reference |
What Verticality Tolerance Should You Accept?
Every specification talks about tolerance, but the numbers vary more than most buyers expect. This is where reading your contract carefully pays off.
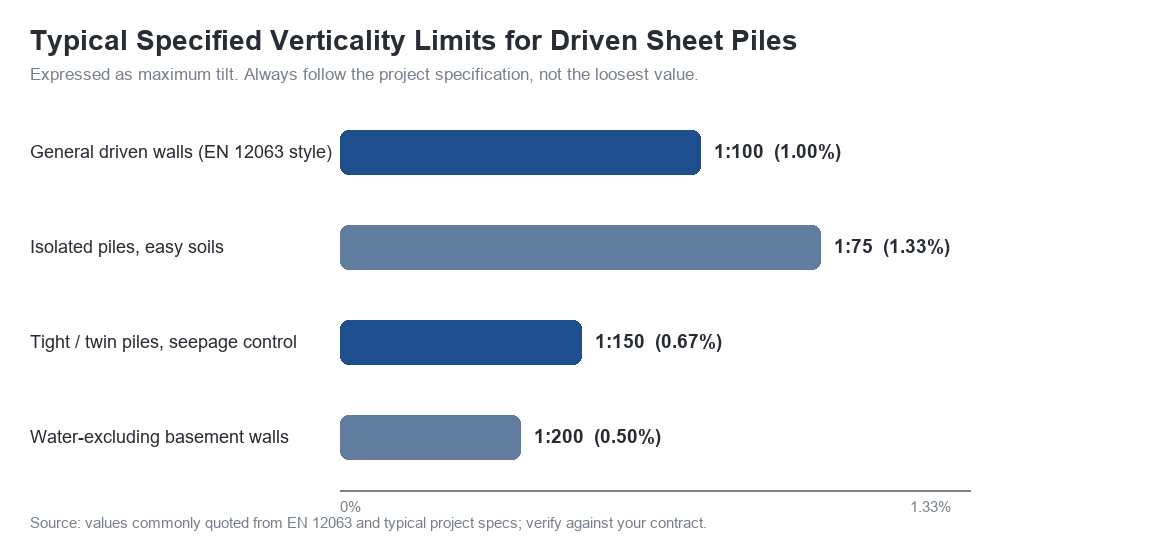
Most driven sheet pile specifications set the verticality limit between 1:75 and 1:200, with 1:100 as the common default for general walls. Water-excluding and seepage-critical walls often demand 1:150 or tighter. Always confirm the exact value in your own specification before mobilizing the piling rig.
How to turn a tolerance into a site practice
A number in a contract does not keep a wall plumb. You need to convert it into checks. If your limit is 1:100, that is about 10 millimetres out of plumb per metre of pile. A simple spirit level and a tape can catch that in the first two metres, but a survey prism on the pile head does it faster and records it for the client.
Second, define where you measure. Most specifications measure on the exposed face over the top section of the pile. Agree this with the engineer before work starts, because arguing about measurement points after driving is a waste of everyone’s week.
Third, match the tolerance to the pile choice. Tighter tolerances need stiffer frames, better leaders, and slower starts, and they cost more. If your wall is a temporary trench support in soft soil, paying for 1:200 is money wasted. If it is a permanent basement wall next to a metro tunnel, it is money well spent. For more on pre-work planning, our key considerations guide walks through the checks I recommend before any mobilization.
| Tolerance | Typical use | What it demands on site |
|---|---|---|
| 1:75 | Isolated piles, easy soils | Standard frame, normal care |
| 1:100 | General driven walls | Leader-guided hammer, two-level frame |
| 1:150 | Tight piles, seepage control | Panel driving, survey checks |
| 1:200 | Water-excluding basements | Press-in or very careful impact driving |
My Take on Vertical Accuracy
Here is my honest view after years of shipping steel sheet piles to ports, basements, and riverbanks on four continents. Vertical accuracy is not a hammer problem. It is a discipline problem. The sites that drive plumb walls are not the ones with the most expensive rigs. They are the ones where somebody checks the leader every morning, where the guide frame is bolted and wedged properly, and where the foreman has the courage to stop a pile in the first metre instead of hoping it straightens itself out. When I visit client projects, the first thing I look at is not the piles. I look at the gates and the platform. If those two things are right, the wall is almost always right. If you buy piles from a supplier who never asks about your installation method, you are buying half a product. A good pile in a careless drive is a bad wall, and no mill certificate will fix it. Plan the accuracy into the job from day one, and the wall will simply follow.
Conclusion
Vertical accuracy comes from four habits: a rigid level frame, a plumb aligned hammer, a slow start, and early correction. Build those habits in, and your sheet pile walls will stand straight, seal tight, and hand over clean.