What Is the Step-by-Step Steel Sheet Pile Installation Process?
Every steel sheet pile wall starts with a single question: will the installation go as planned, or will it eat your margin with re-drives, cracked interlocks, and out-of-tolerance alignment? In our factory and on the job sites we support, I have seen the same pattern. The teams that treat installation as a sequence—not a race—finish faster and with fewer problems.
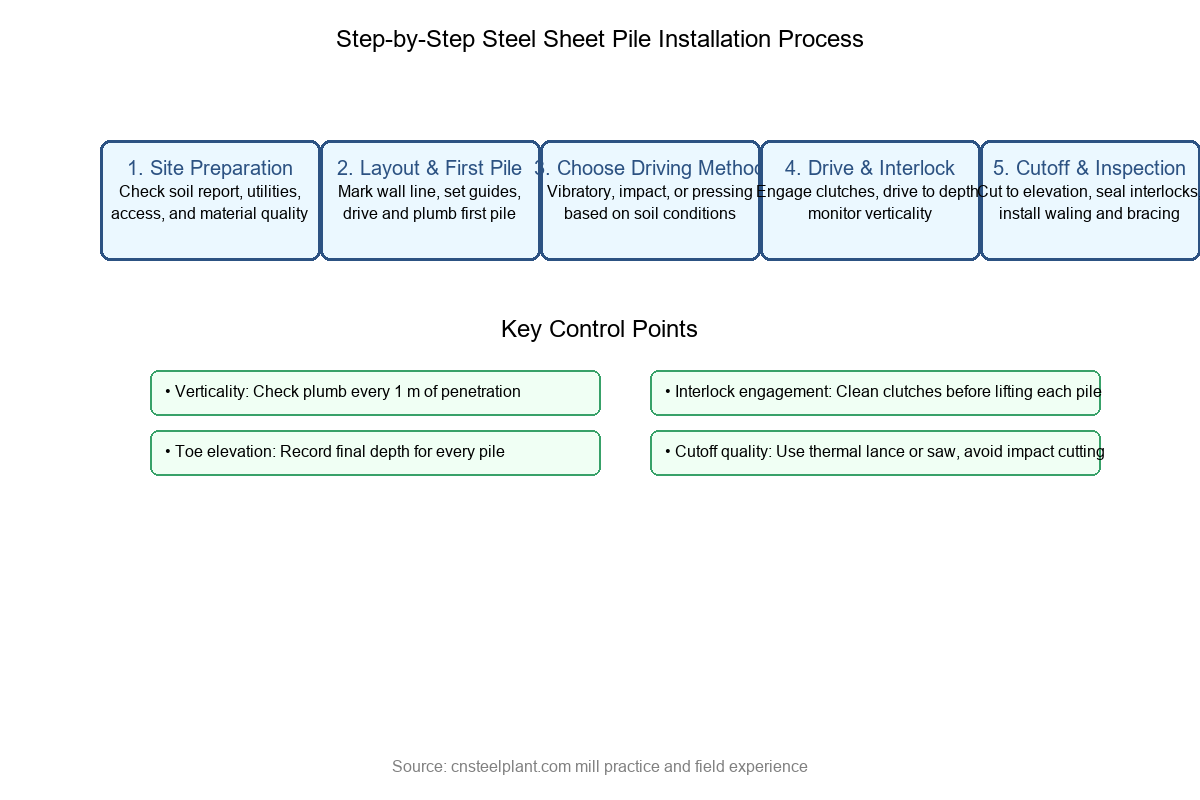
The steel sheet pile installation process includes site investigation, layout and guide placement, driving the first pile, interlocking and driving subsequent piles, verticality control, cutoff and trimming, and final inspection. Each step needs the right equipment and a clear checklist.
If you are a contractor, engineer, or distributor who needs to explain the process to a client—or simply wants a reliable field reference—this guide breaks the work into clear steps. I will also share what our Liaocheng mill team tells customers before the first piling rig rolls onto the site.
What Should You Check Before Mobilizing to the Site?
A rushed mobilization is the fastest way to create delays. Soil reports, utility drawings, and access routes all matter before the first sheet pile is lifted.
Before installation, review the geotechnical report, confirm underground utilities, check access for the piling rig, inspect sheet pile quality and interlocks, and agree on the driving sequence and tolerance limits with the engineer.
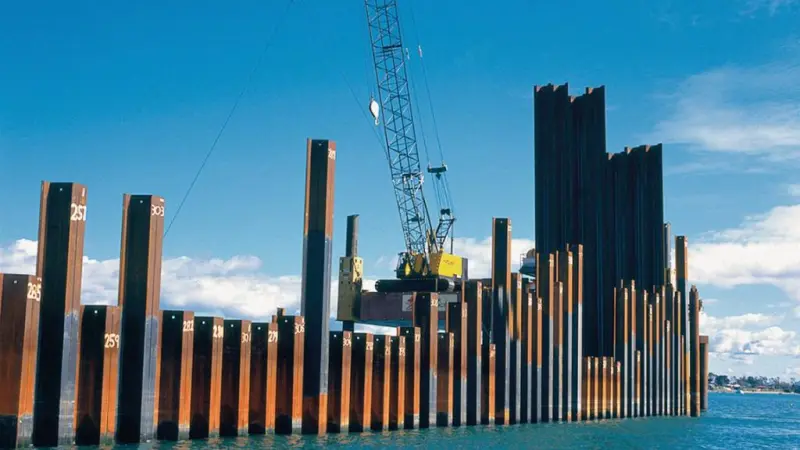
Site Investigation and Documents
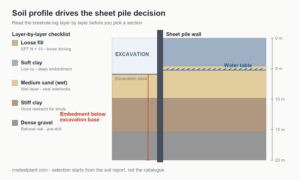
The first thing I ask our customers is whether they have a current geotechnical report. Without it, driving resistance is a guess. The report tells us soil layers, groundwater level, and whether obstructions like boulders or old foundations are likely. We also need the as-built utility plan. A single gas line or fiber optic cable can stop the job for days.
In one Middle East project we supplied, the contractor skipped the utility check and hit an unmapped sewer line during the first meter of driving. The repair cost more than the sheet piles. That lesson is now part of every pre-installation call we make.
Material Inspection
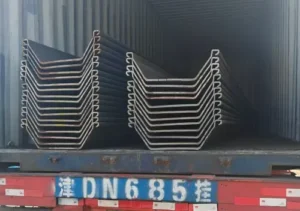
Sheet piles should arrive clean, straight, and with undamaged interlocks. We recommend checking:
| Check Item | Acceptable Condition | Common Reject Reason |
|---|---|---|
| Straightness | No visible bowing | Transport damage or stacking overload |
| Interlock lips | Full profile, no flattening | Improper lifting with chains |
| Surface | Mill scale or light rust acceptable | Deep pitting or lamination |
| Length mark | Matches delivery note | Mixed batches cause layout errors |
| Coating | Uniform if specified | Scratches from dragging on ground |
We support SGS inspection before shipment. For export orders, we also provide mill test certificates and EN 10204 documentation when required. The steel grades we commonly supply are covered in our guide to common steel grades used for sheet piles.
Equipment and Sequence Plan
The rig, leader, hammer, and lifting plan must match the pile profile and site access. A vibratory hammer works well in sand and soft clay. An impact hammer is better in dense soil or when driving through obstructions. I will explain that choice in more detail later.
At this stage, agree on verticality tolerance, interlock engagement, and cutoff elevations. Write them into the method statement. It saves arguments later. Also confirm that the crane has enough reach and capacity. Sheet piles are long and flexible. A sudden swing can bend the pile or injure the crew. We always ask for the lifting plan before we release the bill of lading.
How Do You Position and Guide the First Sheet Pile?
The first pile is the reference for every other pile. If it is out of position or out of plumb, the wall wanders.
Position the first sheet pile exactly on the layout line, brace it with a guide frame or temporary support, check plumb in both directions, and drive it a short distance to hold it before releasing the crane.
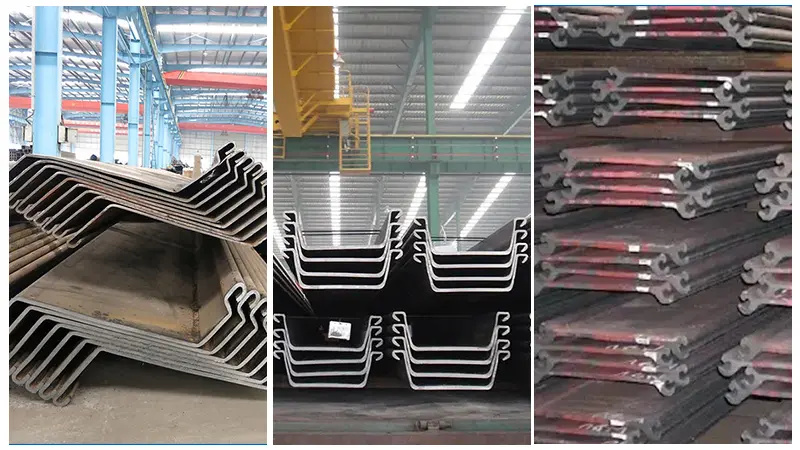
Setting the Layout Line
We usually mark the wall centerline on the ground with paint or stakes. Then we set a template or guide frame that holds the pile at the correct offset. For long walls, a guide frame every 5 to 10 meters keeps alignment honest. In water, a temporary trestle or spud barge does the same job.
Holding the First Pile
The crane lowers the pile into the guide. The operator checks the leading edge against the line. A theodolite or total station verifies plumb in two planes. Once the pile is vertical, the crane holds it while the hammer makes the first few blows or vibrations. Only after the pile is self-supporting should the crane release. A well-engaged interlock is what makes this possible, and we have written about steel sheet pile interlock types and their performance advantages separately.
In our cofferdam projects, the first pair of corner piles is often the most critical. They set the geometry for the whole enclosure. We always recommend driving them first and tying them back before continuing the wall. If cofferdams are part of your scope, see our notes on using steel sheet piles for cofferdams and deep excavations.
For water-based work, positioning is harder. We have supplied piles for jetty and berth projects where the first pile was set from a barge. The crew used a GPS-guided template and held the pile with a vibratory hammer already clamped on. That way, the hammer weight helped keep the pile vertical during the first penetration. On land, a similar effect comes from pre-drilling a short starter hole or using a heavy follower.
What Driving Method Should You Use for Different Soil Conditions?
Choosing the wrong driving method can damage interlocks, slow production, or cause excessive noise and vibration.
Use a vibratory hammer in loose sand, soft clay, and cohesive soils without boulders. Use an impact hammer in dense granular soils, rock layers, or when obstructions require high driving force.
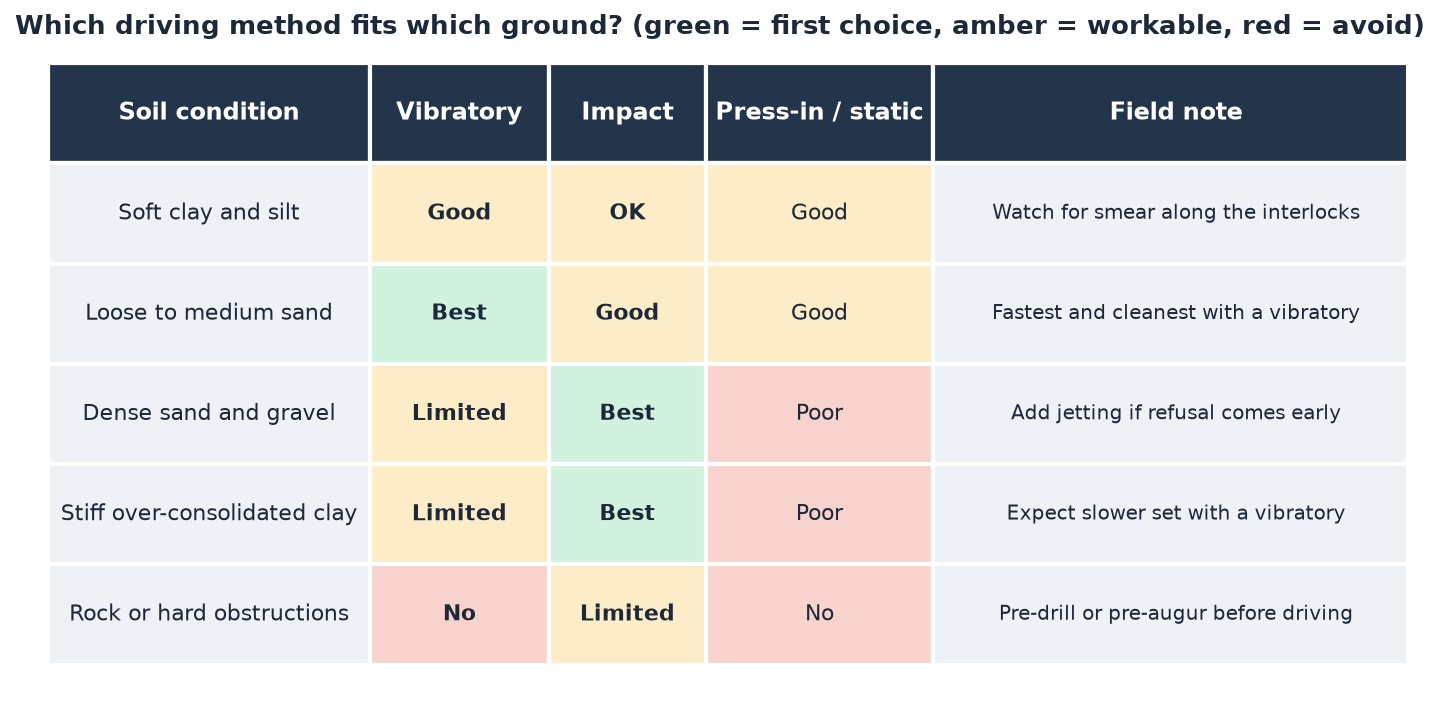
Vibratory Driving
A vibratory hammer clamps onto the pile head and excites the pile with high-frequency vibration. The soil around the pile temporarily liquefies, and the pile sinks under its own weight and a small static load. It is fast, quiet compared to impact driving, and causes less ground vibration.
We see vibratory hammers used most often in port and harbor projects and riverbank works. The soil is usually soft to medium dense, and the contractor wants high production rates. The downside is that vibration can loosen nearby soil or disturb adjacent structures if the frequency is not matched to the ground.
Impact Driving
An impact hammer delivers a series of blows. It works where vibratory driving stalls. In one Australian project, our U-type piles had to pass through a dense sand cap into underlying clay. The contractor started with vibration, switched to impact for the last few meters, and finished on target.
| Driving Method | Best Soil | Production Rate | Noise Level | Risk to Interlocks |
|---|---|---|---|---|
| Vibratory | Sand, soft clay, silts | High | Moderate | Low if amplitude is controlled |
| Impact | Dense sand, gravel, rock | Moderate | High | Higher if blows are off-center |
| Pressing | Sensitive urban sites | Low | Very low | Very low |
For a deeper comparison, see our earlier article on steel sheet pile installation methods.
Pressing and Silent Methods
In built-up areas, vibration limits may rule out both vibratory and impact hammers. Hydraulic pressing rigs push the pile into the ground with static force. Production is slower, but neighboring buildings stay happy. We have seen this method used for basement walls in Middle Eastern city centers where the authorities enforced strict vibration limits.
How Do You Maintain Vertical Accuracy While Driving?
Verticality is one of the most common reasons for rejection. A wall that leans even a few degrees can reduce embedment depth and create gaps at the top.
Check verticality with a plumb bob, total station, or inclinometer every meter of penetration. Adjust the hammer line or use a follower if the pile starts to lean.
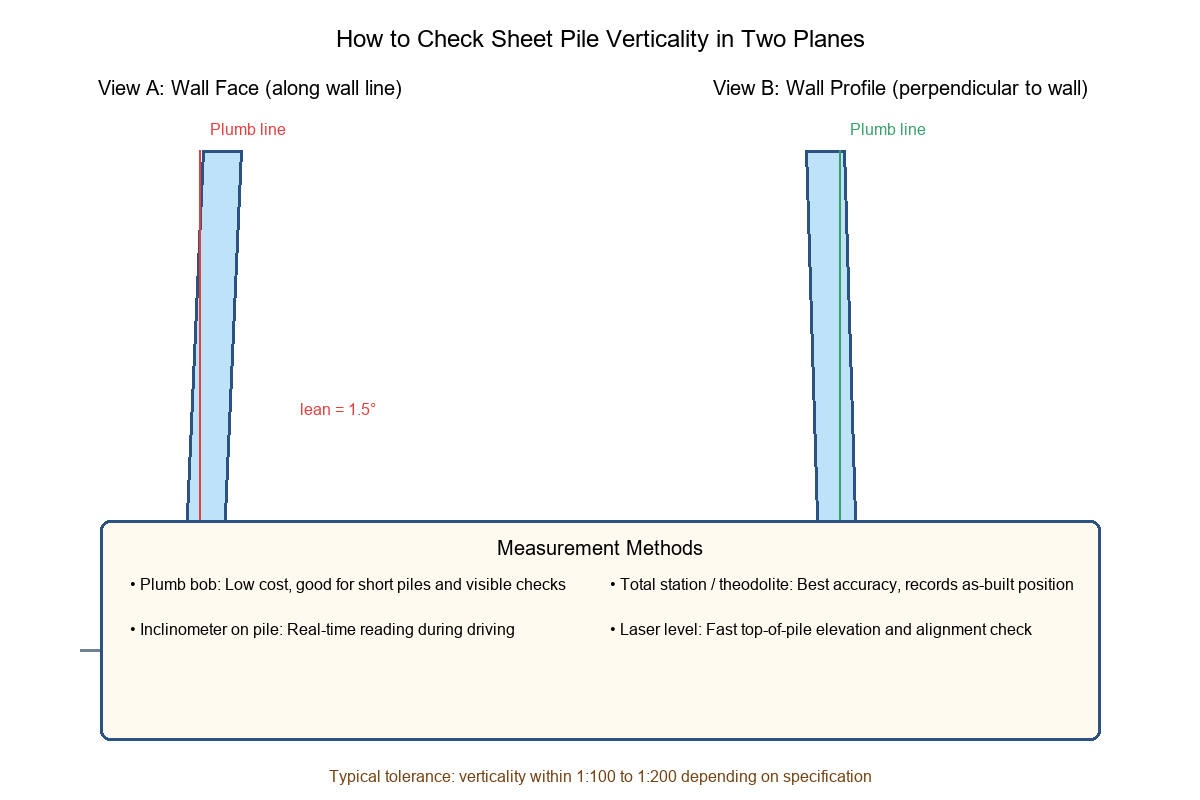
Real-Time Monitoring
I tell crews to watch the pile from two directions at once. One person checks the wall face. Another checks the profile. A total station gives the best accuracy. For long walls, place targets on the pile head and record position as driving proceeds.
If the pile leans, stop immediately. Do not try to correct it by driving harder. The correct fix depends on the cause:
| Lean Direction | Likely Cause | Correction |
|---|---|---|
| Forward | Obstruction or uneven shoe | Pull and reseat, or trim toe |
| Backward | Hammer off-center | Realign hammer and leader |
| Sideways | Bent interlock or foreign object | Inspect interlock, clean, retry |
| Twisting | Mixed pile orientation | Check pile rolling direction |
Prevention is cheaper than correction. We tell crews to drive the first three piles carefully and establish a rhythm. Once the wall has a short run of good alignment, the rest usually follows. If a pile refuses to stay vertical after two corrections, pull it out and inspect the toe and interlock. Forcing it rarely ends well.
For more detail, our guide on how to ensure vertical accuracy during sheet pile driving covers instruments and tolerances.
What Quality Checks Confirm a Safe Installation?
Driving the last pile does not mean the wall is finished. Cutoff, interlock integrity, and drainage details decide whether the wall performs.
Final checks include top elevation survey, interlock continuity, toe elevation, cutoff quality, waling and bracing installation, and documentation of any defects or re-drives.
Cutoff and Connection
Sheet piles are often driven below final grade and then cut to elevation. Cut with a thermal lance or saw, not by impact. A clean cut allows the waling beam to sit flat. If the wall is part of a permanent retaining wall, the cutoff elevation affects drainage and facing details. We compared temporary and permanent designs in our article on steel sheet piles for temporary and permanent retaining walls.
Interlock Sealing
In water-retaining walls, interlocks may need sealing. Common methods include welding the interlock at selected levels, installing interlock sealant, or using a combined steel and grout barrier. The choice depends on the required permeability.
| Sealing Method | Application | Effectiveness |
|---|---|---|
| Welded interlock | Permanent cofferdams, high head | Very high |
| Sealant strip | Temporary walls, moderate head | Moderate to high |
| Grout curtain | Existing walls with leakage | Variable |
Our factory can supply piles with pre-applied sealant or special corner sections to speed this work.
Waling, Bracing, and Drainage
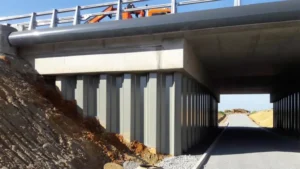
For deep excavations, the sheet pile wall usually needs waling beams and struts to resist earth pressure. Install these as excavation proceeds, not after the wall has moved. This is especially true on projects like subway and underground engineering, where wall movement is tightly controlled. We have seen walls bulge because the contractor dug three meters before placing the first strut. The repair involved adding tie-back anchors and re-dewatering.
Drainage is another detail that is easy to forget. Water pressure behind the wall adds load. Weep holes, collector drains, or dewatering wells keep the pressure down. In one African project, adding a simple drainage layer behind the wall reduced the calculated bending moment enough to allow a lighter section.
Record Keeping
Finally, keep records. Note the final toe elevation of each pile, any re-drives, and the as-built alignment. These records help if disputes arise and make future maintenance easier. They also prove that the work followed the method statement.
My Take: The Details That Separate a Good Job from a Rework
After watching hundreds of projects leave our yard, I believe installation success is 30% equipment and 70% discipline. The best crews spend the morning on layout and the afternoon on driving. They do not skip the first pile check. They stop when something feels wrong.
One detail I always emphasize is the condition of the interlock. A small burr or a piece of clay inside the clutch can turn into a locked pile that refuses to engage. Clean the interlock before lifting. Lubricate if the soil is sticky. It takes two minutes and saves two hours.
Another point is communication between the rig operator and the ground crew. In noisy conditions, hand signals fail. Use radios. The person holding the tag line sees lean before the operator does. That early warning prevents most verticality problems.
Finally, match the pile to the project. A cofferdam in tidal water needs a different profile and driving sequence than a canal retaining wall. We help customers choose U-type, Z-type, or straight-web sections based on load direction and water pressure. The right choice at the start avoids changes in the field.
One more thing: keep spare piles on site. Even with perfect planning, a few piles may get damaged during transport or driving. Having replacements ready prevents the crew from waiting while a truck returns to the yard. From our side, we pack and load carefully, but site conditions are unpredictable. A small buffer is cheap insurance.
Conclusion
A successful steel sheet pile installation moves from site check to layout, driving, verticality control, and final inspection. Follow each step with discipline, and the wall will perform as designed.