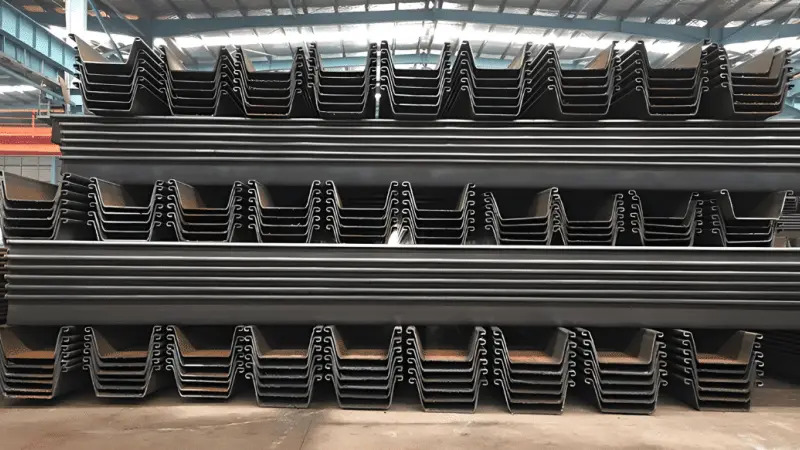
Most sheet pile orders fix the steel grade before anyone calculates the loads. That single line on the RFQ then sets section size, tonnage, price and drivability — and almost nobody reopens it.
Match grade to load in three moves: take the design bending moment per metre of wall, divide by the allowable bending stress to get the required section modulus, then buy the lowest grade whose section delivers that modulus at the lowest total cost.
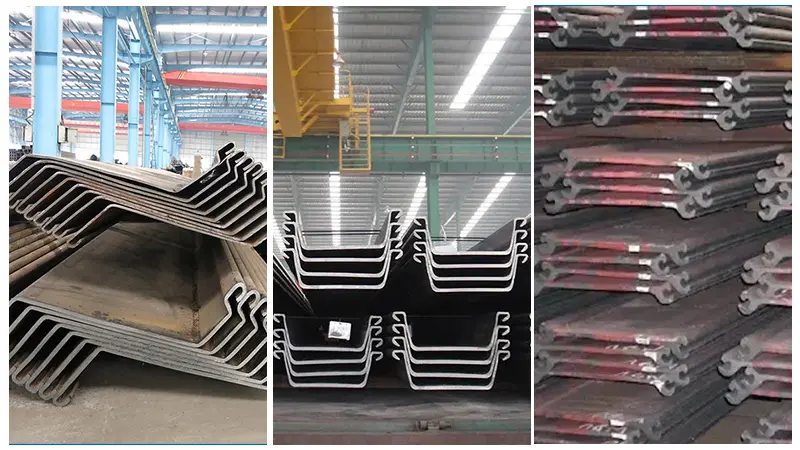
I have quoted walls where the grade came from a drawing note written years earlier, and walls where it came out of the numbers two weeks before rolling. The tonnage difference is rarely small, and it always lands on the buyer’s side of the table. What follows is the exact route I walk with contractors, from the first load case to the grade line on a purchase order — and it starts from the simple fact that steel sheet pile grades are a consequence of load, never a preference.
What Does “Grade” Actually Mean on a Sheet Pile Order?
When a buyer says “grade”, they almost always mean the minimum yield strength) of the steel, expressed in MPa. That is only one of four properties the designation carries, and the other three decide whether the wall survives the hammer.
Grade is the yield strength written into the designation — S355GP means 355 MPa minimum yield — but it also fixes tensile strength, elongation and chemistry, so a grade change is a change of the whole material, not just a number.
Reading a designation like S355GP
The European piling grades are defined in EN 10248-1 for hot-rolled sheet piles, and the American route runs through ASTM A328 for standard piling and ASTM A690 for marine exposure, and the letters are not decoration. Breaking the designation apart tells you what you are entitled to reject at inspection.
| Element | Meaning | What it controls on site |
|---|---|---|
| S | Structural steel | Base family, weldability assumptions |
| 355 | Minimum yield strength, MPa | Bending capacity of the section |
| G | Piling steel | Production route and delivery condition for piling |
| P | General purpose | Impact and tolerance regime for standard piling |
| L / W | Low-temperature impact options | Crack risk in cold climates |
The standard range runs from S240GP through S270GP, S320GP, S355GP, S390GP, S430GP and, from some mills on request, S460GP. Cold-formed sections follow EN 10249 instead and are usually specified as S235JR, S275JR or S355JR, which behave differently because of the cold-worked corners. If you need the full picture of what each designation promises, our guide to common steel grades used for steel sheet piles sets them side by side, and the EN 10248 standard explained covers the testing regime behind the stamp.
Here is the part buyers miss: yield strength is a minimum, not a target. A mill rolling S355GP will typically deliver 380 to 420 MPa, because that is what the chemistry and cooling naturally give. Your design must use the 355 figure, but your driving stresses are being applied to steel that is stronger and often less ductile than the drawing assumes. That gap is why the tensile-to-yield ratio matters as much as the grade number itself.
How Do Project Loads Become a Required Section Modulus?
Everything in grade selection converges on one quantity: the section modulus per metre of wall. Get that number right and the grade becomes a purchasing decision rather than a design guess.
Required section modulus is the design bending moment divided by the allowable bending stress: W = M ÷ σ. Double the moment and you need twice the section; double the yield strength and you need half of it, which is the whole commercial logic of buying a higher grade.
The arithmetic I actually run
I keep this on one line because contractors send me load cases in every format imaginable, from a hand sketch to a 60-page calculation report. The moment per metre of wall (M, in kN·m/m) comes from the designer. The allowable stress comes from the code the project uses, and this is where the conversation usually gets interesting.
Under Eurocode 3, a sheet pile is checked as a steel section in bending, so the resistance is essentially the yield strength divided by the partial factor for section resistance, which is 1.0. Many consultants still hold back another 10 to 15 percent for driving damage, corrosion allowance and the fact that the interlock is not a perfect shear connection. I do not argue with that; I just need to know which assumption is in the number, because a 15 percent stress reduction adds roughly 18 percent to the required section modulus.
| Load component | How it enters the moment | Typical share of M |
|---|---|---|
| Retained soil, active side | Triangular pressure, grows with depth squared | 40–60% |
| Groundwater differential | Full hydrostatic where drainage is blocked | 15–35% |
| Surcharge: traffic, stockpile, crane | Uniform lateral pressure, Ka × q | 10–25% |
| Anchor or tieback reaction | Reduces the span moment, sets anchor load | −30% to −60% |
| Temperature and construction effects | Secondary, rarely governing | under 5% |
The soil parameters come from the geotechnical report, which is why I ask for it before quoting — my note on how to interpret soil investigation reports explains which pages actually change the order. If the wall is anchored, the anchor force and the wall moment are solved together, as our tieback load calculation guide sets out.
Which Grade Fits Which Load Level?
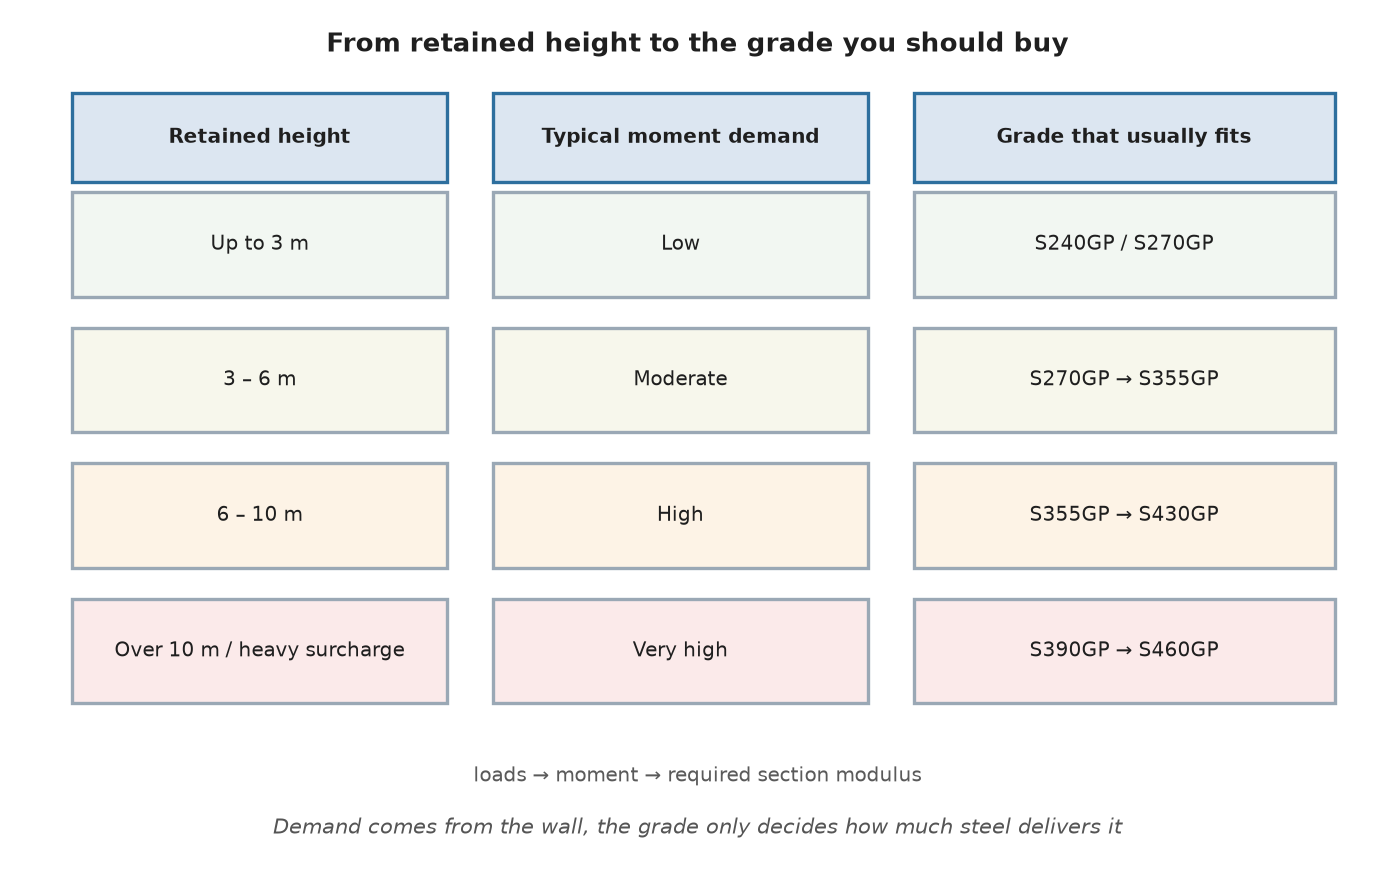
Before any calculation lands on my desk, I can usually narrow the grade from the retained height and the surcharge. This is a quoting heuristic, not a design method, but it stops most conversations from starting in the wrong place.
Retained height is a reliable first filter: up to 3 m rarely needs more than S270GP, 3 to 6 m sits in S270GP–S355GP, 6 to 10 m moves into S355GP–S430GP, and heavy marine walls above 10 m justify S390GP–S460GP.
Where the heuristic breaks down
The matrix fails in three situations, and I have been caught by all of them. The first is high surcharge on a shallow wall: a 4 m wall beside a stockpile loading at 40 kPa can generate more moment than an 8 m wall in clean sand, so height alone lies to you. The second is a hard stratum close to the toe, which shortens the effective span and drops the moment sharply — a wall that looks heavy on paper may only need S270GP. The third is corrosion allowance, where a thicker low-grade section sometimes outlives a thinner high-grade one at the same cost.
| Wall demand | Typical retained height | Realistic grade range | Why |
|---|---|---|---|
| Light shoring, shallow trench | Up to 3 m | S240GP / S270GP, or cold-formed | Low moment, cheap steel wins outright |
| Standard excavation support | 3–6 m | S270GP to S355GP | Mainstream range, S355GP often lightest |
| Deep basement or cofferdam | 6–10 m | S355GP to S430GP | Moment rises fast with depth |
| Heavy marine or port wall | Over 10 m or high surcharge | S390GP to S460GP | Severe modulus demand, high grade keeps thickness workable |
| Aggressive exposure | Any | S355GP with A690 chemistry or equivalent | Durability governs over strength |
Use the matrix to shortlist two grades, then let the numbers choose. The section modulus guide takes you from a required W to actual catalogue sections, which is the step where most over-specification happens.
When Does a Higher Grade Cost Less Than a Lower One?
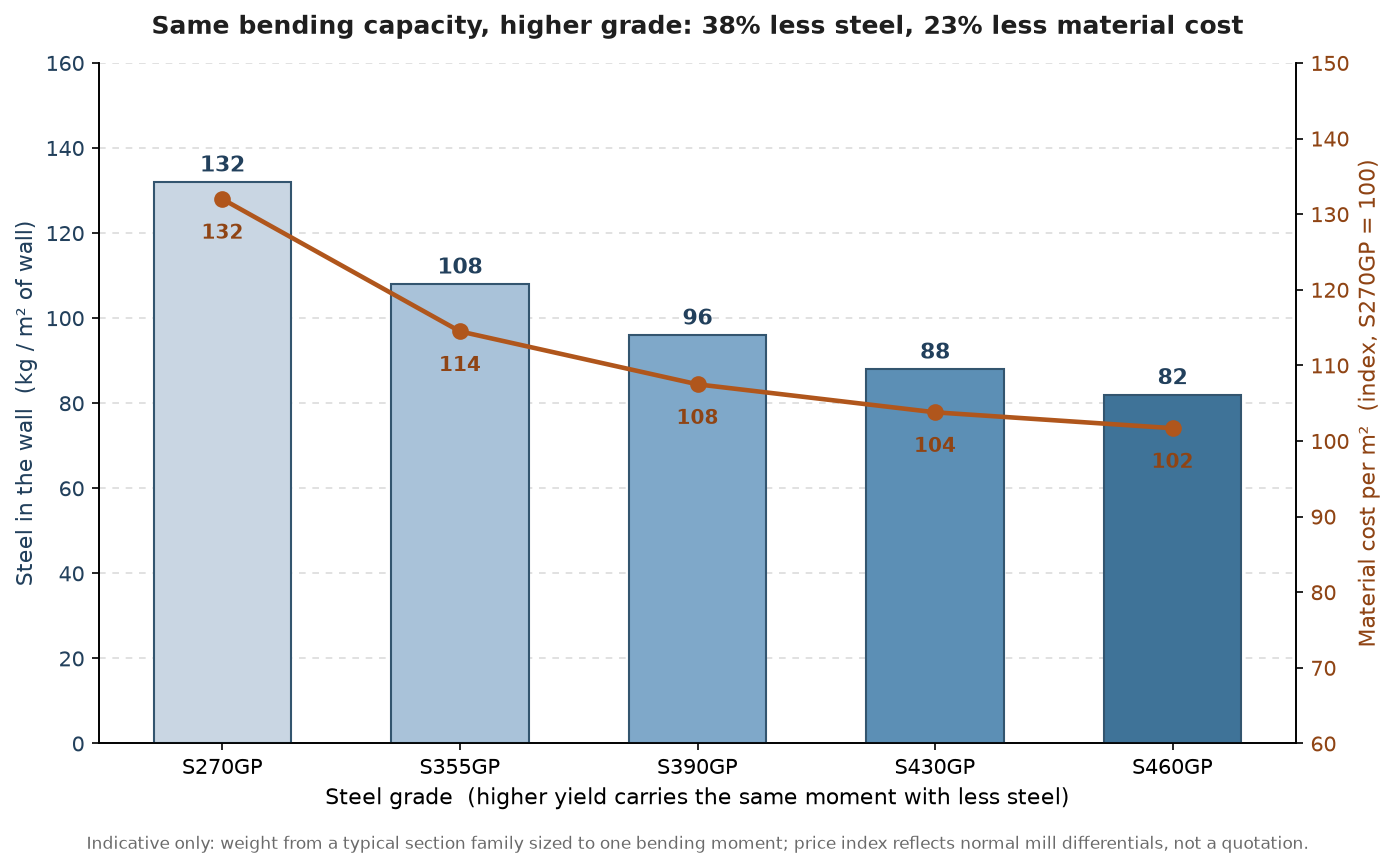
Buyers compare price per tonne, but the wall does not care about tonnes. It cares about section modulus per metre of wall, and a higher grade delivers the same modulus with less steel.
A higher grade cuts wall weight faster than it raises price per tonne. In the 12 m anchored example below, moving from S270GP to S430GP removes 49 kg of steel per square metre of wall and drops material cost per square metre by about 28 percent, even though the tonne price rises.
A worked example on a 12 m anchored wall
Take a 12 m anchored quay wall with a design moment of 480 kN·m per metre of wall and an allowable bending stress of fy divided by 1.1. Required section modulus is M ÷ σ, so the grade alone changes the answer: 1,960 cm³/m at S270GP, 1,486 cm³/m at S355GP and 1,228 cm³/m at S430GP. Then I look for the lightest standard Z-section that clears each figure.
| Option | Grade | Required W (cm³/m) | Section that clears it | Wall weight (kg/m²) | Indicative cost |
|---|---|---|---|---|---|
| A | S270GP | 1,960 | AZ 26-700 | 137 | 100 (index) |
| B | S355GP | 1,486 | AZ 20-700 | 105 | 82 |
| C | S430GP | 1,228 | AZ 17-700 | 88 | 73 |
The tonne price in this example rises from about USD 780 to USD 880 between A and C, yet the cost per square metre of wall falls from roughly USD 107 to USD 77, because 49 kg of steel per square metre disappears faster than the price differential grows. Multiply by the wall area of a real project and the saving is a line item, not a rounding error.
There are counterweights, and I would be lying if I left them out. S430GP is not stocked in every size, so you may wait for a rolling campaign or pay for a mill minimum. Thin high-grade sections can be more delicate to drive. And if the design moment is low, the section you need is already small, so the absolute saving shrinks to the point where a standard S355GP from stock is the better commercial answer.
How Do Strength, Ductility and Toughness Interact?
A grade number tells you where the steel stops behaving elastically. It says nothing about how the steel behaves after that point, and driving a pile is a brutal test of exactly that.
Yield strength resists bending, but tensile strength, elongation and impact toughness decide whether the pile survives the hammer and the first winter. A grade with a high yield and a thin elongation margin is a false economy on driven work.
What each property is actually protecting
The piling standards tie these properties together on purpose. EN 10248-1 caps the yield-to-tensile ratio and sets minimum elongation so that a section which is overloaded deforms visibly instead of cracking. When a buyer asks for “the strongest grade available”, they are often asking for the least forgiving material in the catalogue.
| Property | What it controls | Typical piling requirement | What happens if you push it |
|---|---|---|---|
| Yield strength, fy | Bending capacity, section modulus demand | 240–460 MPa depending on grade | Over-spec wastes money; under-spec fails the check |
| Tensile strength, fu | Ultimate reserve, driving stress tolerance | 470–630 MPa for S355GP | Low fu with high fy gives brittle behaviour |
| fy/fu ratio | Ductility reserve | Typically capped around 0.85 | High ratio means little warning before failure |
| Elongation at fracture | Deformation before cracking | Commonly 17–20% minimum | Too low risks toe cracking in hard driving |
| Impact toughness | Crack arrest at low temperature | 27 J at the specified test temperature | Cold-climate projects need a low-temperature option |
In the Middle East and Southeast Asia, where most of our orders go, low-temperature toughness is rarely the governing issue; heat, abrasion and chloride exposure are. In northern China, Eastern Europe or Canadian work, impact testing at −20 °C or lower belongs in the specification, and it changes both the steel and the delivery time. If your project sits in seawater, the chemistry matters more than the strength: our comparison of ASTM A690 versus S355 explains why a 355 MPa weathering steel can outlast a 430 MPa plain carbon one.
Does a Higher Grade Make Driving Harder?
Yes, in a way that surprises buyers who assume stronger steel drives more easily. The hammer delivers energy to the pile, and a lighter, thinner, stronger section absorbs that energy differently from a heavy mild one.
Higher grades usually mean thinner walls for the same capacity, and thin walls are less stiff, lighter per metre and more prone to toe damage and local buckling in dense ground — so the grade decision and the installation method have to be made together.
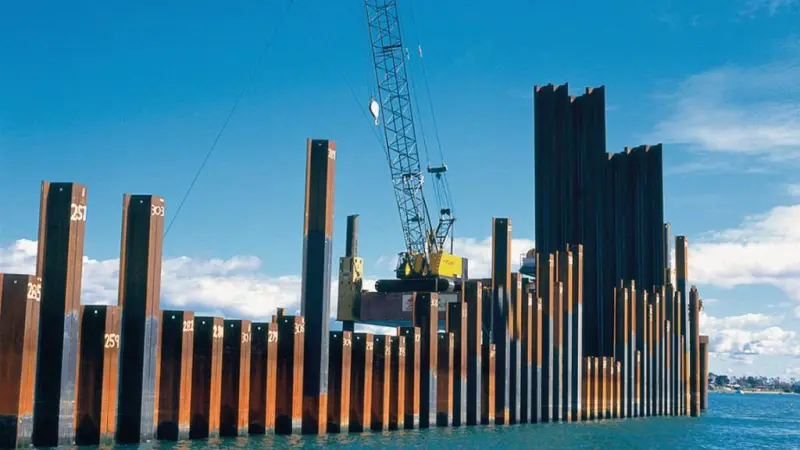
Why the section, not the strength, governs driving
Driving stress depends on the hammer energy per blow, the pile mass, the soil resistance and the section’s ability to transmit force to the toe without buckling. A high-grade section at 88 kg/m² has less mass to carry the wave and thinner flanges to resist local buckling than a low-grade section at 137 kg/m². In loose sand this is irrelevant. In dense gravel, weathered rock or fill with obstructions, it decides whether you reach design depth.
| Grade and section | Driving behaviour I see on site | What I recommend |
|---|---|---|
| S270GP, heavy section | Slow but forgiving, tolerates obstruction contact | Standard vibratory driving, no special measures |
| S355GP, mainstream section | Predictable, good compromise of stiffness and weight | Vibratory, impact where refusal is likely |
| S430GP, thinner section | Reaches depth quickly in clean soil, sensitive to point loading | Reinforced toe, accurate pitching, pre-boring if obstructions |
| S460GP, thin section | Efficient in bending, least tolerant of abuse | Pre-boring or predrilling, strict verticality control, soft-start driving |
The practical rule I give contractors is simple: if the ground has obstructions and the design pushes you to a high grade, price the toe protection and the pre-boring into the comparison before you decide the grade saved money. Our note on how pile weight affects installation and cost covers the equipment side of the same trade-off.
What Can You Actually Buy, and How Do You Specify It?
A grade that cannot be rolled in your length, or cannot be delivered before your mobilization date, is not a grade — it is a delay with a mill certificate attached.
Availability is a design constraint. S355GP is stocked almost everywhere, S430GP depends on the mill’s rolling programme, and S460GP is often a special order with a mill minimum — so specify the grade you can actually receive on the date you need it.
Matching the standard to the market
Projects drawing on European practice specify EN 10248 grades; projects with American detailing specify ASTM A328, A572 or A690. The two systems — EN 10248 and ASTM A572 — are close but not interchangeable, and the material certificate is where the difference becomes visible.
| EN 10248 grade | Nearest ASTM equivalent | Minimum fy | Typical availability from our mill |
|---|---|---|---|
| S240GP / S270GP | ASTM A328 | 235–270 MPa | Stocked, short lead time |
| S355GP | ASTM A572 Grade 50 | 355 MPa | Stocked in common sections |
| S390GP / S430GP | ASTM A572 Grade 60 / 65 | 390–430 MPa | Rolling programme, plan ahead |
| S460GP | A572 Grade 65 or proprietary | 460 MPa | Special order, mill minimum applies |
| A690 chemistry on S355GP base | ASTM A690 | 345 MPa | On request, weathering chemistry |
Two documents do the work of protecting you here. The first is the RFQ line: state grade, standard, impact option, length, section and quantity, in that order, and add “mill test certificate to EN 10204 3.1 with heat numbers” so nobody substitutes. The second is the mill test certificate itself — check that the heat number on the certificate matches the bundle tag, that yield and tensile results bracket your specified grade, and that the chemical composition sits inside the standard’s limits. Our quality and inspection guide lists the checks in the order I run them before a bundle leaves the yard.
The full dimensional side of the same specification — thickness, width, section modulus per metre — is in our dimensions and section modulus guide, which is the document I send when a buyer has a grade but no section.
What Mistakes Do Buyers Make When They Fix the Grade Early?
The expensive mistakes are not exotic. They are ordinary habits, repeated because nobody was asked to justify the grade line.
The four recurring errors are copying a grade from a previous project, choosing the highest grade as insurance, mixing grades in one wall without a transition detail, and accepting a substitution on the certificate without checking the tensile results.
The patterns I see most often
| Mistake | What it actually costs | Better approach |
|---|---|---|
| Copying the grade from a nearby project | 10–25% extra tonnage, or a section that is too light for the new surcharge | Re-derive W from the current load case |
| Specifying the highest grade “to be safe” | Higher tonne price, thinner wall, harder driving, longer lead time | Shortlist two grades and compare cost per m² of wall |
| Mixing grades along one wall | Uneven stiffness, stress concentration at the joint, inspection arguments | Keep one grade per wall, or design the transition explicitly |
| Accepting a mill substitution | Certification risk, possible rejection at site | Require written approval and re-check fy and fu on the MTC |
| Ignoring corrosion allowance in the grade decision | Premature perforation in splash zone | Choose chemistry for exposure, then thickness for loss |
I once quoted a project where the specification demanded S430GP for a 5 m wall in loose sand. The required section modulus was satisfied by an S270GP section at 12 percent more weight and 19 percent less cost, delivered six weeks earlier. The engineer agreed within a day once he saw the moment calculation, because the grade had never been a design decision — it had been a default. That is the pattern worth breaking: ask for the moment, not the grade, and let the supplier show you two ways to carry it.
My View
After enough orders, I have stopped treating grade as a quality label. It is a lever: pull it up and you buy less steel at a higher price per tonne, pull it down and you buy more steel cheaply, and somewhere between the two there is a minimum total cost that depends on the section family, the mill’s rolling programme and the ground the pile has to enter. Buyers who ask for the moment get a better answer than buyers who ask for the strongest grade, because the first question has a number attached and the second one has a habit attached.
Conclusion
Match grade to the moment your wall actually carries, compare options by cost per square metre of wall, and confirm the mill can deliver it.