You are on a construction site. The sheet piles have arrived. Now you need to get them into the ground. The soil is dense in some areas and soft in others. The buildings next door are sensitive to vibration.
Sheet pile driving methods include vibratory driving1 (most common), impact driving (for hard soils), press-in (silent piling for urban sites), and jetting (for sandy soils). Equipment selection depends on soil conditions, pile length, site access, and vibration/noise restrictions. Vibratory hammers are the standard choice for most projects.
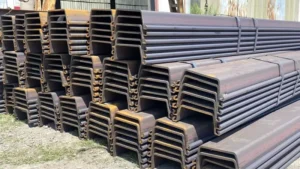
](https://cnsteelplant.com/wp-content/uploads/2026/03/Article-Application-Subway-1.webp)
I have supplied sheet piles for projects using every type of driving method. The riverbank project in Southeast Asia used vibratory hammers from an excavator. A metro project in Singapore used press-in piling2. A port project in the UAE used impact hammers for dense sand. Let me walk you through the methods and how to select the right equipment.
Sheet pile driving equipment
Sheet pile driving equipment includes hammers (vibratory, impact, press-in), cranes or excavators for handling, and guide frames for alignment.
The main types of sheet pile driving equipment are vibratory hammers1 (for most soils), impact hammers2 (for hard soils or dense layers), press-in machines3 (for silent piling in urban areas), and excavator-mounted vibratory hammers4s](https://rpiequipment.com/2022/03/what-are-the-advantages-of-hydraulic-vibratory-hammers/)[^1] (for small to medium projects). The equipment choice affects installation speed, cost, and environmental impact.
](https://cnsteelplant.com/wp-content/uploads/2026/03/Article-Application-Subway-2.webp)
Equipment Comparison
Let me compare the main types of sheet pile driving equipment.
Vibratory Hammers
| Feature | Description |
|---|---|
| How it works | High-frequency vibrations reduce soil friction |
| Best for | Sandy soils, granular materials, most projects |
| Advantages | Fast, relatively quiet, good for extraction |
| Disadvantages | Less effective in dense clays or cobbles |
| Typical size | 20-200 kN eccentric moment |
| Mounting | Crane or excavator |
Impact Hammers
| Feature | Description |
|---|---|
| How it works | Heavy ram strikes pile top |
| Best for | Dense soils, gravels, cobbles, hard driving |
| Advantages | Can penetrate hard layers |
| Disadvantages | Loud, high vibration, slower |
| Typical size | 5-50 kJ energy rating |
| Mounting | Crane with leads |
Press-In Machines (Silent Piler)
| Feature | Description |
|---|---|
| How it works | Hydraulic jacks press piles into ground |
| Best for | Urban sites, sensitive structures, noise-restricted areas |
| Advantages | Silent, no vibration, precise alignment |
| Disadvantages | Slower, higher cost, requires reaction force |
| Typical size | 500-2,000 kN clamping force |
| Mounting | Self-contained machine |
Excavator-Mounted Vibratory Hammers
| Feature | Description |
|---|---|
| How it works | Vibratory hammer attached to excavator arm |
| Best for | Small to medium projects, tight access |
| Advantages | Versatile, good maneuverability |
| Disadvantages | Limited power for deep piles |
| Typical size | 10-50 kN eccentric moment |
| Mounting | Excavator (20-40 ton class) |
My Experience
For the riverbank project, we used an excavator-mounted vibratory hammer. The excavator was 30 tons, and the hammer had 30 kN eccentric moment. The piles were 15 m long and drove easily in the sandy soil.
Sheet pile installation methods
Sheet pile installation methods vary by soil condition, project requirements, and environmental constraints.
The main sheet pile installation methods are vibratory driving (standard for most soils), impact driving (for hard driving conditions), press-in (silent piling for urban sites), jetting (using water jets to loosen soil), and pre-drilling (to penetrate hard layers). Each method has advantages and limitations.
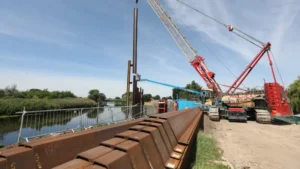
](https://cnsteelplant.com/wp-content/uploads/2026/03/Article-Application-City-5.webp)
Installation Method Selection
Let me explain each method and when to use it.
- Process: High-frequency vibrations (1,500-2,500 Hz) reduce soil friction
- Best for: Sandy soils, granular materials, most conditions
- Installation rate: 20-50 piles per day
- Noise level: 80-100 dB at 10 m
- Vibration: Low to moderate
- Process: Heavy ram strikes pile top (30-120 blows per minute)
- Best for: Dense soils, gravels, cobbles, hard layers
- Installation rate: 10-30 piles per day
- Noise level: 90-120 dB at 10 m
- Vibration: High
Press-In (Silent Piling)
- Process: Hydraulic jacks press piles into ground
- Best for: Urban sites, sensitive structures, noise-restricted areas
- Installation rate: 10-20 piles per day
- Noise level: 60-70 dB at 10 m
- Vibration: None
Jetting
- Process: High-pressure water jets at pile tip loosen soil
- Best for: Sandy soils, loose granular materials
- Installation rate: 15-30 piles per day
- Noise level: 70-85 dB at 10 m
- Vibration: Low
- Process: Drill hole before driving to remove obstructions
- Best for: Cobbles, boulders, dense layers
- Installation rate: 5-15 piles per day
- Noise level: Varies by drilling method
- Vibration: Low
Method Selection Guide
| Soil Condition | Recommended Method |
|---|---|
| Loose to medium sand | Vibratory |
| Dense sand | Vibratory or impact |
| Gravel, cobbles | Impact with pre-drilling |
| Soft clay | Vibratory or press-in |
| Stiff clay | Impact |
| Urban site, sensitive structures | Press-in |
| Underwater | Vibratory or impact |
My Experience
For a project with dense sand and cobbles, we used impact hammers with pre-drilling. The pre-drilling removed the cobbles, and the impact hammer drove the piles to depth. The installation took longer, but it was the only method that worked.
Sheet pile installation with excavator
Installing sheet piles with an excavator is common for small to medium projects. The excavator provides both handling and driving power.
Sheet pile installation with an excavator uses a vibratory hammer1 attached to the excavator arm. The excavator positions the pile, holds it plumb, and operates the hammer. This method is ideal for projects with limited access, moderate pile lengths (up to 15 m), and good soil conditions. Excavators from 20 to 40 tons are typically used.
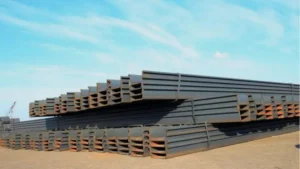
[^1]](https://placehold.co/600x400 "Sheet Pile Installation with Excavator")](https://cnsteelplant.com/wp-content/uploads/2026/03/Article-application-4.webp)
Excavator Installation Process
Let me explain how to install sheet piles with an excavator.
Equipment Requirements
- Excavator: 20-40 ton class
- Vibratory hammer: 20-50 kN eccentric moment
- Hydraulic power pack: Usually integrated with hammer
- Guide frame: Optional for alignment
Installation Steps
- Position excavator along the alignment
- Attach vibratory hammer1 to excavator arm
- Pick up sheet pile using hammer clamps or lifting eye
- Position pile in guide frame or against previous pile
- Check plumbness
- Start vibratory hammer1
- Lower pile into ground using excavator arm
- Continue until pile reaches depth
- Release hammer and move to next pile
Advantages of Excavator Installation
- Single machine for handling and driving
- Good maneuverability in tight spaces
- Lower cost than crane-mounted systems
- Quick setup and mobilization
Limitations
- Limited pile length (typically under 15 m)
- Less power than large crane-mounted hammers
- Excavator must be sized for pile weight
Excavator Size Guide
| Pile Section | Pile Weight (kg/m) | Max Length (m) | Excavator Size (tons) |
|---|---|---|---|
| U 400 x 100-10.5 | 48 | 12 | 20 |
| U 400 x 125-13 | 60 | 15 | 25 |
| U 400 x 170-15.5 | 76 | 15 | 30 |
| U 600 x 180-13.4 | 82 | 12 | 30 |
| AZ 18 | 75 | 15 | 30 |
| AZ 26 | 109 | 12 | 35-40 |
My Experience
For the riverbank project, we used a 30-ton excavator with a 30 kN vibratory hammer1. The piles were U 400 x 125, 15 m long, weighing 900 kg each. The excavator handled them easily, and we installed 22 piles per day.
Driving sheet piles with excavator
Driving sheet piles with an excavator is a efficient method for many projects. The excavator provides the power to lift, position, and drive the piles.
Driving sheet piles with an excavator requires a vibratory hammer1 attached to the excavator arm2. The operator positions the pile, engages the hammer, and lowers the pile into the ground. The vibratory hammer1 reduces soil friction, allowing the pile to sink under its own weight plus the downward force from the excavator. This method works well in sandy soils.
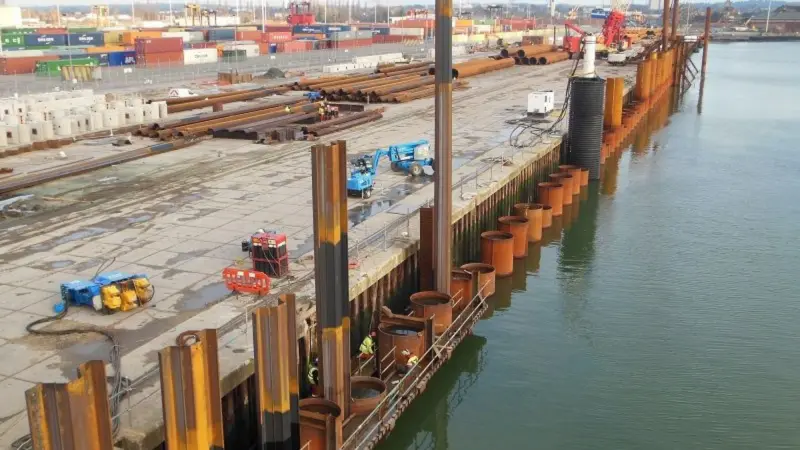
[^1]](https://placehold.co/600x400 "Driving Sheet Piles with Excavator")](https://cnsteelplant.com/wp-content/uploads/2026/03/Article-Application-City-6.webp)
Driving Process and Tips
Let me explain the driving process3 and share tips for success.
Pre-Driving Checklist
- Verify excavator is on stable ground
- Check hydraulic connections to hammer
- Inspect hammer clamps for wear
- Ensure pile is straight and undamaged
- Set up guide frame4 if needed
Driving Process
- Pick up pile: Use hammer clamps to grip pile near top
- Position pile: Move excavator to place pile in correct location
- Check plumbness: Use level on excavator or laser
- Start hammer: Engage vibratory hammer1 at low speed
- Lower pile: Use excavator arm2 to push pile downward
- Monitor penetration: Watch for changes in driving speed
- Stop at depth: Shut off hammer when pile reaches elevation
- Release pile: Open clamps and move to next pile
Tips for Success
- Keep piles clean (no mud in interlocks)
- Use guide frame4s for long piles or deep excavations
- Drive the first pile carefully (it sets alignment for the wall)
- Stagger splices along the wall
- Monitor for pile tilt and correct immediately
Common Problems and Solutions
| Problem | Cause | Solution |
|---|---|---|
| Pile tilts | Soft soil, uneven driving | Use guide frame4, check plumbness |
| Slow driving | Dense layer, cobbles | Pre-drill or use impact hammer |
| Pile won’t reach depth | Underestimated penetration | Splice additional section |
| Interlock separation | Pile not plumb | Pull and re-drive |
My Experience
For the riverbank project, we drove 500 piles with an excavator-mounted vibratory hammer1. The first pile took 15 minutes to position and drive. By the end, the crew was driving a pile every 8 minutes. The key was keeping the guide frame4 aligned and checking plumbness on every pile.
Conclusion
Sheet pile driving methods include vibratory1 (most common), impact2 (hard soils), press-in (urban sites), and jetting (sandy soils). Excavator-mounted vibratory1 hammers are ideal for small to medium projects with piles up to 15 m long. Choose the method based on soil conditions, pile length, and site constraints.
-
Explore the benefits of vibratory methods for efficient and effective sheet pile installation. ↩ ↩ ↩ ↩ ↩ ↩ ↩ ↩ ↩ ↩ ↩ ↩ ↩
-
Learn about the specific conditions where impact driving excels, especially in hard soils. ↩ ↩ ↩ ↩ ↩ ↩
-
Learning about the driving process can help you avoid common pitfalls and ensure successful pile installation. ↩ ↩ ↩
-
Understanding the guide frame’s importance can significantly improve alignment and stability during pile driving. ↩ ↩ ↩ ↩ ↩