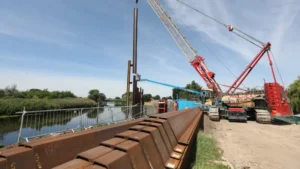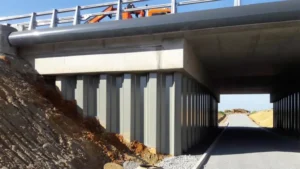
Poor interlock connection can ruin a sheet pile wall before the real loading even starts. I have seen walls look straight from outside but leak, bind, or drift because the locks were not connected correctly.
The right way to connect sheet pile interlocks is to inspect the locks first, clean debris, align the male and female ends correctly, thread them gently without forcing, and keep the pile plumb during pitching and driving. Good interlock practice protects wall strength, alignment, and water tightness.
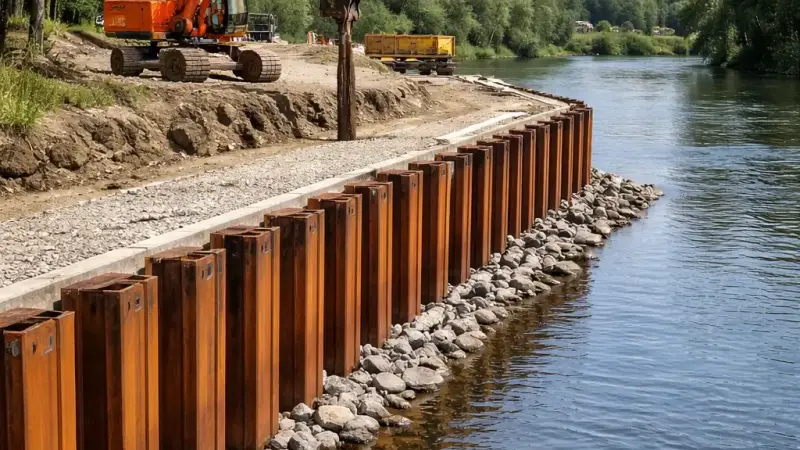
If I had to pick one detail that decides whether a sheet pile wall goes in smoothly or turns into a jobsite headache, I would pick the interlock. Many people focus on section modulus, hammer type, or pile length. Those things matter, of course. But if the interlock is damaged, dirty, misaligned, or forced together the wrong way, the whole wall can suffer. That is why I want to walk through this topic in a very practical way. I will not treat interlocks as a small accessory. I treat them as the spine of the wall.
How to interlock sheet piles?
If the interlock is forced, dirty, or misaligned, the wall can jam or leak. I always slow down at this stage because fixing a bad lock after driving is much harder.
To interlock sheet piles, I first inspect both interlocks, remove rust flakes and soil, confirm the pile orientation, and then thread the new pile into the installed pile from the top. I keep the pile aligned and let it slide into place before driving.
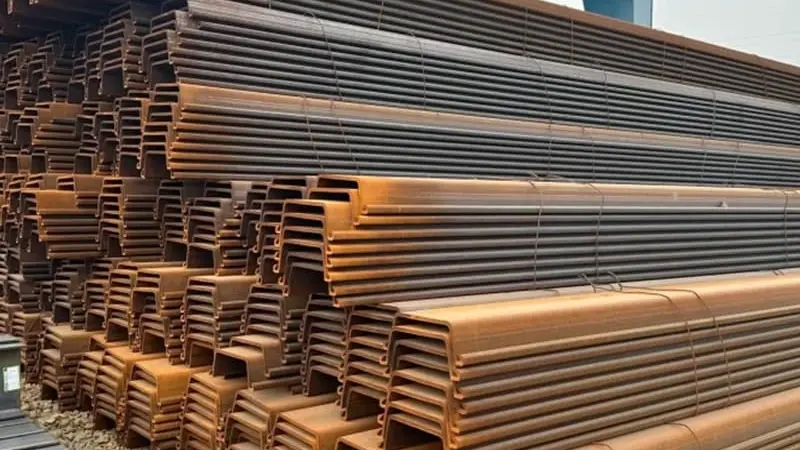
When I explain interlocking to clients or site teams, I keep it simple: a sheet pile wall works because each pile does not act alone. The interlock joins each section into a continuous wall. That connection has to carry alignment, transfer force, and in many projects help control water. If the connection is weak, jammed, partly engaged, or opened during driving, the wall may still stand for a while, but it will not perform the way the design intended. For installation guidance and construction details, see the AMCRPS Sheet Piling Handbook and UFGS 31 41 16 Metal Sheet Piling.
I always start with interlock inspection, not driving
Before I let a pile anywhere near the hammer, I check the lock condition. I look for:
- bent interlock lips
- crushed corners
- heavy rust scale inside the lock
- mud, stones, welding spatter, or transport damage
- distortion caused by poor lifting or stacking
This is one of my strongest views from real jobs: many “driving problems” are actually interlock preparation problems. If the lock is damaged before pitching, the crew often blames the hammer, the soil, or the operator. In fact, the trouble started in the yard or during unloading.
My step-by-step method for proper interlocking
I usually follow this sequence on site:
1. Confirm pile orientation
I decide which interlock should lead during driving. In many sheet piling jobs, contractors prefer the male interlock leading because the female side can collect soil if it leads. This is a widely repeated site rule, and it is mentioned in several installation guides from piling specialists and contractors. See the guidance from the Steel Piling Group and practical installation notes from Aarsleff.
2. Clean the lock before pitching
I do not assume a “new pile” means a clean lock. I use a wire brush, compressed air, or a simple scraper if needed. If the wall is for water retention, I pay even more attention because dirt inside the interlock can affect sealant performance and lock engagement. For watertightness and interlock sealant guidance, see the Sheet Pile Water Tightness and Interlock Sealant Guide.
3. Lift and lower slowly
The new pile should not be dropped into the lock. I lower it slowly and line up the top of the interlock with the already placed sheet. At this point, guide frames and walings help a lot because they keep the pile in line while the crane operator makes small adjustments. Practical guidance on guide frames is also covered in sheet pile guide frames.
4. Thread from the top
I engage the lock from the top and allow the new pile to slide down into the existing one. I do not hammer the interlock together sideways. If it does not engage smoothly, I stop and check why. Forcing a lock is one of the fastest ways to create a hidden problem.
5. Check engagement length before driving
I want to see that the piles are genuinely threaded together, not just touching at one point near the top. Partial engagement can lead to declutching during driving, especially in hard ground or when vibration is high.
6. Keep the pile plumb while driving
Once driving starts, I keep checking alignment. A lock can open if the pile rotates, twists, or drifts too much under hammer action. This is why I see interlock quality and verticality as one system, not two separate topics. The installation manual from ArcelorMittal Installation of Steel Sheet Piles shows how guide control and interlock engagement work together during installation.
Why I do not like rushing the first few sheets
The first sheets set the line for the whole wall. If the first two or three sheets are not properly interlocked and kept plumb, the error can multiply down the wall. I would rather spend an extra hour on the first panel than lose a day correcting misalignment later.
My practical rule for interlock quality control
I use this simple field logic:
| Check item | What I look for | Why it matters |
|---|---|---|
| Interlock shape | No crushing, no visible distortion | Damaged locks jam or leak |
| Cleanliness | No soil, rust flakes, debris | Debris prevents full engagement |
| Orientation | Correct male/female leading decision | Reduces plugging and resistance |
| Engagement | Lock fully threaded before driving | Prevents declutching |
| Alignment | Pile kept plumb in guide frame | Reduces lock opening during driving |
My own view on “just drive it, it will pull in”
I hear this too often on rushed jobs. Someone says, “Just start driving, the pile will pull itself into the lock.” Sometimes they get lucky. Many times they do not. I do not like relying on luck in sheet piling. Once the interlock binds under load, correction becomes slow, expensive, and sometimes impossible without extraction. My view is simple: interlocks should be connected by control, not by hope.
What are common pile driving mistakes?
Most pile driving mistakes start before the hammer hits the steel. I usually find the root cause in planning, setup, or poor interlock handling.
Common pile driving mistakes include damaged interlocks, poor guide alignment, forcing piles into hard ground, using the wrong hammer settings, driving without checking plumb, and ignoring early signs of declutching or refusal.
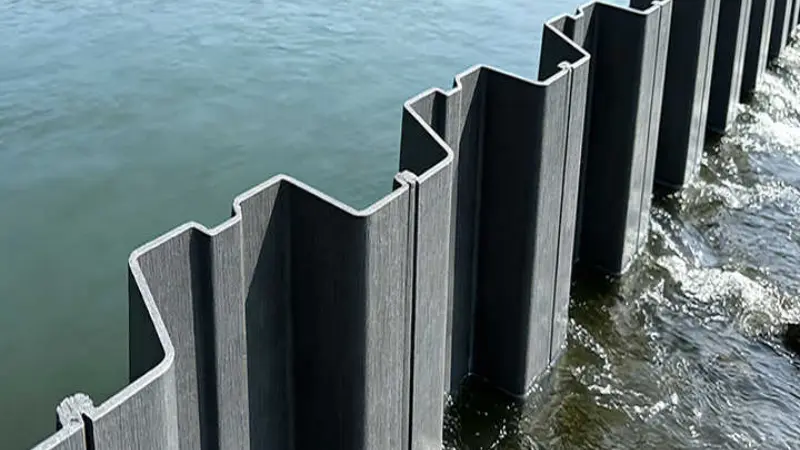
I have watched enough installations to say this clearly: pile driving mistakes are rarely “one big dramatic failure” at the start. They usually begin as a series of small shortcuts. A dirty interlock gets ignored. A guide frame is not rigid enough. The first pile is slightly out of plumb, but the crew keeps going. The hammer is a bit too aggressive for the section, but no one stops to adjust. Then, a few piles later, the wall line wanders, the locks bind, and everyone suddenly acts surprised. I am not surprised when that happens. The warning signs were already there.
Mistake 1: Starting with damaged or dirty interlocks
This is still one of the most common problems I see. If the lock is dented, filled with debris, or distorted, driving resistance goes up and engagement quality goes down. I never like the phrase “we’ll sort it out while driving.” Interlocks are not something I want to “sort out later.”
Mistake 2: No proper guide frame or weak temporary works
A guide system is not optional on a serious sheet pile job. It is one of the main controls for line and plumb. Industry guidance repeatedly stresses the value of templates and guide structures in keeping sheet piles aligned during installation. Practical guidance from Marine Construction Magazine and the Steel Piling Group both point to guides and templates as essential tools, not extras.
Mistake 3: Forcing a pile when refusal or obstruction appears
If a pile suddenly stops moving, I do not assume “more hammer” is the answer. The pile may have hit a cobble, old foundation, dense layer, or it may have rotated and jammed in the interlock. Overdriving in that situation can damage the head, distort the lock, or push the wall out of line. I prefer to stop, inspect, and decide whether pre-augering, jetting, impact assistance, or extraction is the right move.
Mistake 4: Wrong hammer selection or poor hammer settings
A hammer that is too weak wastes time and can stall progress. A hammer that is too aggressive can damage the pile or over-stress the lock. I always want hammer choice to match section size, pile length, soil resistance, and vibration limits on site. Urban jobs are especially sensitive because vibration and noise restrictions can limit what methods are acceptable.
Mistake 5: Driving singles or pairs without a clear sequence
Sequence matters. Some walls are better driven in panels. Some jobs suit pitch-and-drive. Some need staged driving in small increments. If the sequence is poor, piles can lean, rotate, or declutch. I do not treat installation sequence as a minor site choice. I treat it as part of constructability planning.
Mistake 6: Failing to monitor plumb during driving
A pile can start straight and still drift later. That is why I want checks during installation, not only before it starts. If I wait until the pile is fully driven to discover a lean or twist, I have already lost the easiest correction window.
Mistake 7: Letting the crew chase speed instead of control
I understand production pressure. I work in supply, and I know projects are watching daily output. Still, I would rather install fewer piles in one day than create a wall with misalignment, lock opening, or leakage risk. A fast bad wall is not a win.
The mistakes I watch most closely in interlock work
Because this article is about interlocks, I pay special attention to these site mistakes:
| Mistake | What usually happens next | My response |
|---|---|---|
| Dirty interlock used anyway | Binding, incomplete lock, leakage risk | Stop and clean |
| Pile forced into lock | Distortion or declutching | Re-thread carefully |
| First pile not plumb | Entire wall line drifts | Reset early |
| Hammer energy too high | Pile head damage, lock stress | Adjust method or hammer |
| Obstruction ignored | Bent pile, refusal, misalignment | Investigate ground condition |
My own judgment from field support work
If I had to give one blunt opinion, it would be this: most pile driving mistakes are not mysterious engineering failures; they are preventable control failures. When the crew respects setup, line, interlock condition, and stop points, the wall usually behaves. When those basics are skipped, the wall often punishes the schedule later.
How to splice a pile?
Splicing looks simple on paper, but a bad splice can weaken alignment, interlock fit, and driving performance. I only splice when I have a clear reason and a controlled procedure.
To splice a sheet pile, I match the same profile and steel grade, cut and prepare the ends, align them carefully, weld or mechanically join them according to project requirements, and then inspect the splice before driving. The interlock geometry must remain undamaged and continuous.
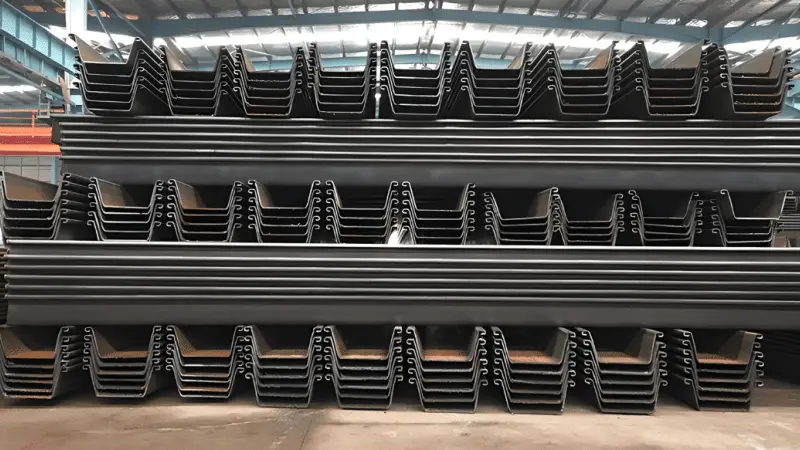
Splicing is one of those topics where people often speak too casually. Someone says, “Just weld another length on it.” I do not see it that way. A splice changes the behavior of the pile during lifting, pitching, driving, and final service. If the splice is poorly aligned, the pile can bend at the joint, twist under driving, or create trouble at the interlock. So yes, splicing can be done, but I want it done with discipline.
Why I splice a sheet pile in the first place
I normally splice for one of these reasons:
- the required pile length exceeds available stock length
- the design changes and longer embedment is needed
- part of a pile is damaged and the salvage plan allows repair
- a combined wall or staged construction detail needs a special fabricated piece
I do not like splicing just because someone guessed wrong on planning and wants a quick patch without engineering review. That is where trouble starts.
My first rule: profile compatibility comes before welding
I never splice blindly. I confirm:
- same section profile
- compatible steel grade
- matching interlock geometry
- acceptable tolerance on straightness and sweep
- splice location acceptable for driving and service
This is especially important for Z piles. Randomly pairing unmatched sections can create a poor fit. Practical guidance in the piling sector often warns against careless splicing of Z sections because profile mismatch can cause real problems during driving.
My basic splice workflow
Here is the process I prefer:
1. Confirm design approval
If the pile is part of a permanent retaining wall, I want the splice method accepted by the engineer. I do not like unapproved site improvisation.
2. Prepare both ends
I cut the ends square and remove rust, paint, and contamination from the weld zone. If the ends are not prepared properly, weld quality suffers from the start.
3. Align the pile carefully
I place the sections in a jig or controlled support frame. I check straightness, web alignment, and interlock continuity. If the interlock is offset at the splice, I know driving trouble is coming.
4. Protect the interlock shape
This is the part I care about most in this article. I do not allow heat distortion, weld spatter, or grinding damage to ruin the lock. If the interlock shape changes, the pile may become useless for proper engagement.
5. Weld according to procedure
The exact weld design depends on section type, load, and project rules. In some cases, backing plates, cover plates, or reinforcing details may be used. I always want qualified welding and inspection when the splice matters structurally.
6. Re-check straightness before shipment or driving
A spliced pile can look fine on the ground and still bow slightly. That small bow becomes a major problem during pitching. I inspect before it leaves the fabrication area.
Splice risks I watch carefully
Splicing introduces a few extra risks:
| Splice risk | What it can cause |
|---|---|
| Poor alignment at joint | Driving deviation or wall misalignment |
| Heat distortion near lock | Interlock jamming |
| Weak weld quality | Structural weakness during driving or service |
| Mismatch of profiles | Uneven force transfer and difficult pitching |
| Excessive local stiffness change | Stress concentration under hammer action |
My own view on when not to splice
I do not treat splicing as a default option. If I can supply the right length from the start, I prefer that. A single full-length pile is cleaner for handling and usually easier for the contractor. I splice when the project truly needs it, not because the yard wanted to “make something work.”
How splicing relates back to interlocks
This matters a lot: even if the splice itself is structurally sound, the pile can still fail as a usable sheet pile if the interlock geometry is lost. I have seen beautifully welded steel become a frustrating product on site because the lock area was not protected during fabrication. So when I talk to buyers about spliced piles, I always bring the conversation back to the interlock. If the interlock does not work, the splice does not matter.
Do sheet piles need a capping beam?
A sheet pile wall can stand without a capping beam in some temporary works, but many permanent walls benefit from one. I decide this based on load transfer, alignment, durability, and the top-of-wall detail.
Sheet piles do not always need a capping beam, but permanent walls often use one to tie piles together, distribute loads, improve alignment, support railings or barriers, and create a clean finished edge. The need depends on design function and service conditions.
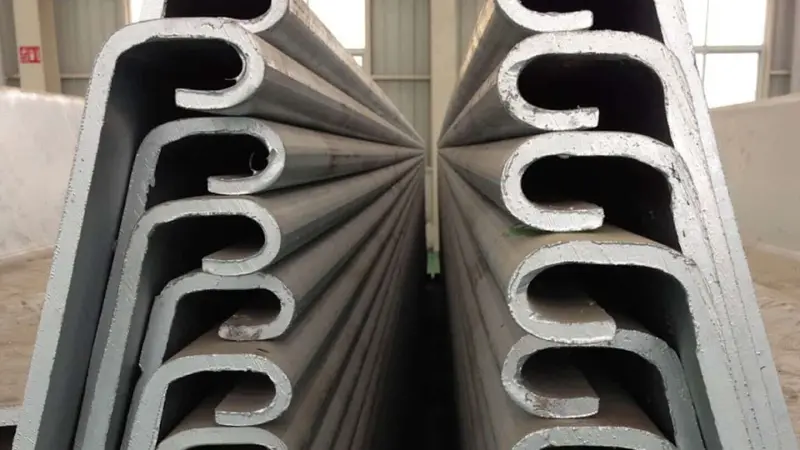
This is a question I get a lot, especially from buyers who are comparing a temporary excavation wall with a permanent waterfront or road project. My answer is always the same: do not ask whether every sheet pile wall needs a capping beam; ask what the top of the wall is expected to do. That is the real design question.
Cases where I may not insist on a capping beam
Temporary shoring works sometimes do not need a full capping beam. If the wall is only in service for a short period and there is no permanent load or architectural finish requirement at the top, the engineer may decide the beam is unnecessary. In some excavation support jobs, the wall is later cut off, removed, or hidden by later works.
Cases where I strongly expect a capping beam
For permanent retaining walls, flood walls, marine structures, or public-facing infrastructure, a capping beam often makes sense because it can:
- tie adjacent piles together at the top
- help distribute local loads
- support handrails, parapets, fences, crash barriers, or deck elements
- provide a cleaner and more durable finished edge
- reduce the effect of small top-level irregularities
- improve overall appearance for exposed works
How capping beams help interlock performance indirectly
A capping beam does not “fix” a bad interlock. I want to be very clear about that. If the piles were misthreaded or declutched during installation, the beam is not a magic cure. But a properly designed beam can help tie the wall top together and reduce independent movement of individual sheets at the head. In that sense, it supports the overall system.
My design and supply perspective
When I discuss permanent sheet pile walls with contractors or distributors, I ask these questions:
- Is the wall temporary or permanent?
- Will the top of wall carry any superimposed load?
- Is a watertight or visually neat top detail required?
- Are there railings, barriers, coping, or utilities fixed to the wall?
- Is the owner sensitive to long-term maintenance and appearance?
The answers usually tell me whether a capping beam should be part of the conversation.
Simple comparison I use with clients
| Situation | Is capping beam often needed? | Why |
|---|---|---|
| Temporary excavation shoring | Not always | Short service life, limited finish needs |
| Permanent retaining wall | Often yes | Better top restraint and finish |
| Waterfront wall with railing | Usually yes | Supports attachments and coping |
| Flood wall / riverbank wall | Often yes | Helps create durable top detail |
| Utility trench support to be removed later | Often no | Temporary system only |
My own experience from riverbank protection projects
In riverbank and flood control works, I usually look at the capping beam as part structural, part practical. It gives a defined top line. It helps integrate the wall with walkways, edge protection, or inspection access. It also makes the finished project look intentional rather than temporary. In our Southeast Asia riverbank protection case, the hot rolled U type sheet piles were chosen for strong interlocking performance and durable retention. In that kind of project, the top detail matters almost as much as the embedment because the owner is not buying a short-term excavation aid. They are buying a long-term asset.
My honest view on overusing capping beams
I do not push capping beams onto every project just to increase scope. That is not how I work. If the wall is temporary and the engineer does not need it, I will say so. But if the wall is permanent, exposed, load-bearing at the top, or expected to remain straight and serviceable for years, I will usually ask the buyer to look closely at the capping beam detail rather than treat it as an afterthought.
Conclusion
Proper sheet pile interlock connection starts long before driving. I focus on clean locks, correct orientation, careful threading, and steady alignment because one bad interlock can affect the whole wall.