Many construction projects fail not because of design, but because installation is not done correctly. Small mistakes can cause wall failure, delays, and high repair cost.
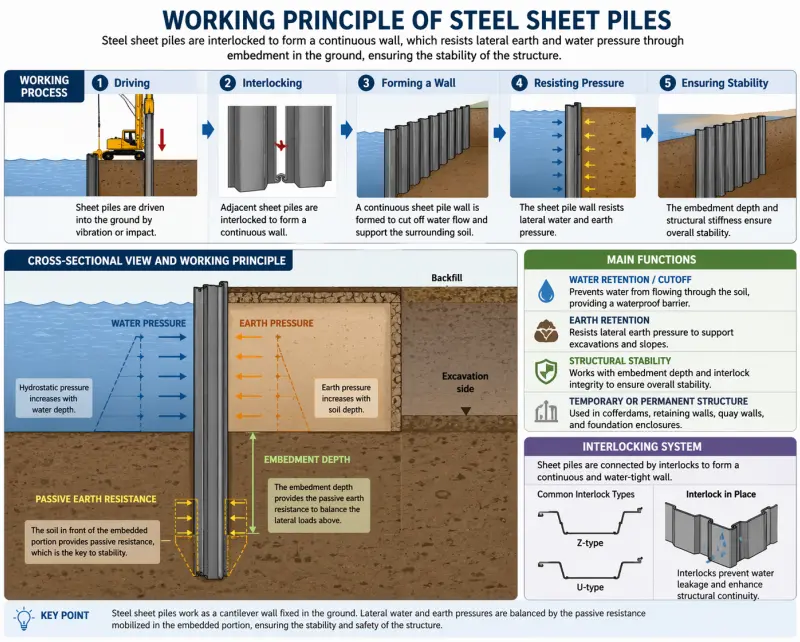
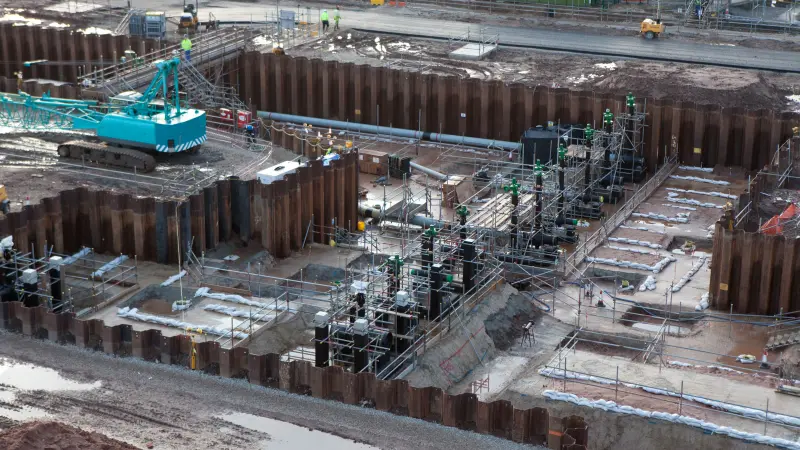
Steel sheet piles are installed by preparing the site, positioning piles, driving them into the ground using impact or vibratory hammers, aligning interlocks, and finishing with trimming and capping beam construction when required. Proper control of alignment and depth is essential for stability.

I often see contractors focus only on material selection. But installation is just as important as the steel itself. A good sheet pile design can still fail if installation is not controlled. In this article, I explain the full step-by-step process and answer common questions from real project experience.
For installation guidance and execution planning, see the ArcelorMittal installation page and the ArcelorMittal installation manual.
What are common pile driving mistakes?
Many site problems come from simple mistakes during driving. These mistakes often lead to leaning walls, damaged interlocks, or unstable excavation support.
Common pile driving mistakes include poor alignment, incorrect hammer selection, insufficient penetration depth control, and ignoring soil resistance variations during installation.
Poor Alignment at Start
The first pile sets the direction of the entire wall. If the first pile is not vertical, the whole line will shift.
I often see this mistake in rushed projects. Contractors try to speed up installation without proper guide frames.
Wrong Equipment Selection
Different soil types need different driving energy.
- Soft soil needs controlled vibration
- Hard soil needs higher impact energy
- Mixed soil needs adaptive equipment
Wrong equipment can damage piles or stop penetration.
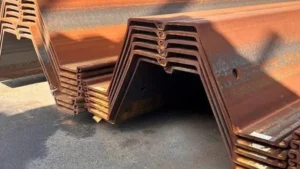
Ignoring Interlock Damage
Interlocks are very important for water tightness and structural strength.
If interlocks are damaged during driving:
- Wall leakage can happen
- Structural continuity is reduced
- Re-installation becomes difficult
Uneven Driving Depth
Some piles go deeper than others. This creates uneven load distribution.
| Mistake | Result |
|---|---|
| Tilted pile | Wall misalignment |
| Over-driving | Material waste |
| Under-driving | Weak support |
My Field Observation
I often see mistakes happen when contractors skip site preparation steps. They want fast progress, but sheet piling needs control.
In one project in Southeast Asia, the contractor corrected alignment issues after the first 10 piles. That small correction saved major rework later.
My view is simple. Good installation is not fast. Good installation is controlled.
For common execution methods and site guidance, see the Steel Piling Group guidance notes and the ArcelorMittal installation guidance.
What are the methods of installing piles?
Different soil and project conditions require different installation methods. There is no single universal solution.
The main methods of installing piles include impact driving, vibratory driving, pressing systems, and drilling-assisted installation depending on soil resistance and environmental restrictions.
Impact Driving Method
This method uses a hammer that strikes the pile.
It is strong and effective for dense soil.
Advantages:
- High penetration power
- Suitable for hard layers
Disadvantages:
- High noise
- High vibration
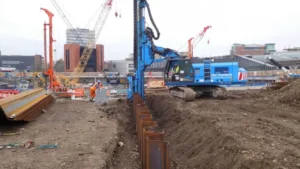
Vibratory Driving Method
This method uses vibration to reduce soil resistance.
It is widely used for sheet piles.
Advantages:
- Fast installation
- Lower resistance in sandy soil
Disadvantages:
- Not ideal for rock layers
Press-In Method
This method pushes piles slowly into the ground.
It is used in urban areas.
Advantages:
- Low noise
- Low vibration
Disadvantages:
- Slower speed
Drilling Assisted Method
This method combines drilling and driving.
It is used in very hard ground.
Comparison Table
| Method | Speed | Noise | Best Use |
|---|---|---|---|
| Impact | Fast | High | Hard soil |
| Vibratory | Very fast | Medium | Sandy soil |
| Press-in | Slow | Very low | Urban areas |
| Drilling | Slow | Medium | Rock layers |
My Experience
I often recommend vibratory installation for most sheet pile projects.
But I always check soil reports first.
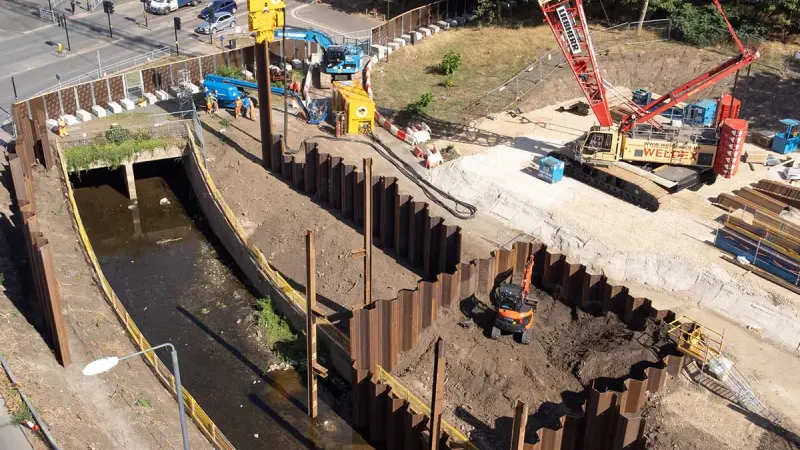
In our riverbank project in Southeast Asia, vibratory hammers were used. The installation was fast and stable. The interlock system worked well under continuous driving.
For modern driving techniques and low-noise options, see the Keller sheet piles page and the Steel Piling Group guidance notes.
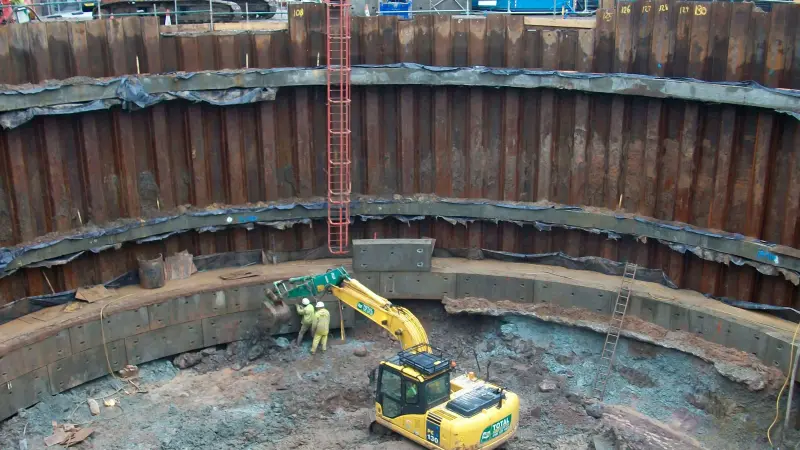
How deep do sheet piles need to go?
Many clients only focus on visible wall height. But underground depth is the real key to stability.
Sheet piles usually need to go 50% to 70% deeper than the retained height, depending on soil strength, water pressure, and structural load requirements.
Why Depth Matters
The buried part resists:
- Soil pressure
- Water pressure
- Sliding force
- Rotation force
If depth is not enough, the wall will fail even if the above-ground section looks stable.
Simple Rule of Thumb
| Retained Height | Embedment Depth |
|---|---|
| 3 m | 1.5–2.1 m |
| 5 m | 2.5–3.5 m |
| 8 m | 4–5.6 m |
| 10 m | 5–7 m |
Soil Conditions Change Everything
- Soft clay needs deeper embedment
- Dense sand gives better support
- Rock layers reduce penetration ability
My Practical View
I always tell clients not to rely only on rules of thumb.
I once worked with a contractor who reduced embedment to save steel cost. Later, they had to reinforce the wall. That cost much more than the original saving.
So I always recommend full geotechnical analysis before final design.
For design and installation depth references, see the ArcelorMittal installation manual and the Steel Piling Group design guidance.
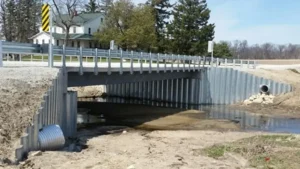
Do sheet piles need a capping beam?
Many beginners think sheet piles alone are enough. In most real projects, that is not true.
Sheet piles often need a capping beam to connect all piles, distribute loads evenly, and improve structural stability and alignment control.
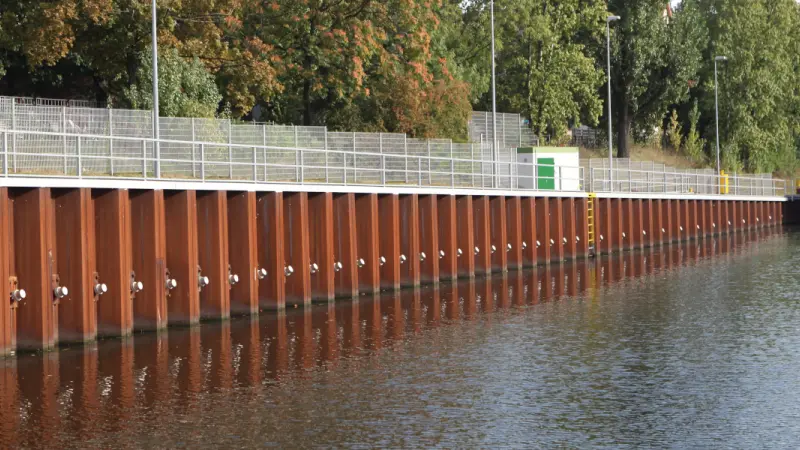
What Is a Capping Beam
A capping beam is a concrete or steel beam placed on top of sheet piles.
It connects all piles into one system.
Main Functions
- Align pile heads
- Distribute loads
- Improve stability
- Protect pile tops
When It Is Needed
- Permanent retaining walls
- Marine structures
- High load environments
When It May Not Be Needed
- Temporary excavation support
- Short-term projects
- Low load applications
My Experience
I usually recommend capping beams for long-term structures.
In marine environments, I always suggest it because wave pressure creates uneven loading.
Without a capping beam, small misalignment can grow into structural issues over time.
For capping beam detailing and structural context, see the Designing Buildings capping beam page and the Sheet Piling (UK) capping beam detail PDF.
What are the disadvantages of using sheet piles?
Sheet piles are widely used, but they are not perfect for every condition.
Disadvantages of sheet piles include noise and vibration during installation, corrosion in aggressive environments, limited performance in very hard soil, and possible deflection under high loads.

Noise and Vibration
Installation can disturb nearby buildings.
This is a problem in urban areas.
Corrosion Risk
Steel can corrode in:
- Marine environments
- Industrial soil
- High moisture zones
Protection systems are often needed.
Hard Soil Limitations
Rock layers can stop penetration.
Sometimes pre-drilling is required.
Wall Deflection
Flexible walls may move under load.
This must be controlled with anchors or stronger sections.
My Opinion
I think many disadvantages can be managed with correct design.
The real problem happens when buyers ignore soil conditions and choose the wrong system.
Sheet piles are not weak. Poor planning is weak.
What is the rule of thumb for sheet pile embedment?
Many early-stage designs use simple rules before final engineering checks.
A common rule of thumb is that sheet pile embedment should be about 50% to 70% of the retained height, but final depth must always be verified by soil analysis and engineering calculation.
Why Engineers Use Rules of Thumb
Rules help during:
- Budget planning
- Early design
- Feasibility studies
Limitations of Rules
Rules do not consider:
- Complex soil layers
- Groundwater changes
- Nearby structures
- Load variations
Better Engineering Approach
A proper design includes:
- Soil investigation
- Stability analysis
- Structural calculation
My Field Experience
I have seen many projects start with rule-of-thumb design.
Later, engineers adjust embedment after real soil data.
This is normal in construction.
But I always tell clients not to freeze design too early before geotechnical data is ready.
Step-by-Step Installation Summary
Steel sheet pile installation usually follows these steps:
1. Site Preparation
The ground is cleared and leveled.
2. Setting Out
Alignment lines are marked.
3. Guide Frame Installation
A guide frame helps keep piles vertical.
4. First Pile Placement
The first pile controls alignment accuracy.
5. Driving Process
Piles are driven using vibratory or impact hammers.
6. Interlock Connection
Each pile locks with the next one.
7. Depth Control
Engineers check penetration depth regularly.
8. Cutting and Capping
Pile heads are trimmed and capped if required.
My Final Field View
I always believe installation is where design becomes reality.
Even the best sheet pile design will fail if installation is not controlled.
Good installation needs experience, patience, and attention to detail.
Conclusion
Steel sheet pile installation is a controlled process that requires correct equipment, proper sequencing, and accurate depth control. The best results come from careful planning and field execution.