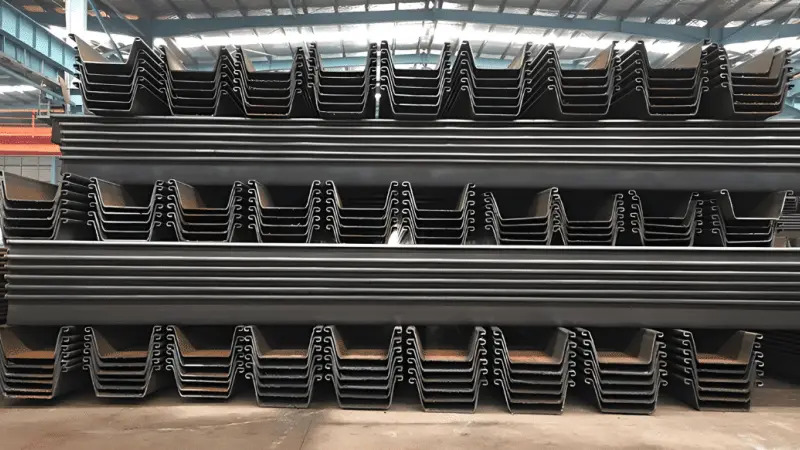
How to Calculate Steel Sheet Pile Quantity from Project Drawings
Buying the wrong amount of steel is an expensive mistake. A short order stops your wall mid-drive. An oversized order locks your cash into piles you never use.
To calculate steel sheet pile quantity from drawings, measure the wall length on the plan view, divide it by the pile width to get the pile count, multiply exposed height plus embedment by the wall length to get the wall area, and then multiply the area by the profile’s weight per square metre. Add 3 to 5 percent for wastage.

Most buyers I work with estimate quantity from memory or from a contractor’s rough number. That habit costs money. In this article, I will walk you through the exact takeoff method our export team uses when we check a client’s href=”https://en.wikipedia.org/wiki/Sheet_piling target=”_blank” rel=”noopener”>steel sheet pile quantity before we quote. Each step uses information that already sits on your drawings. You do not need special software. You need a plan view, a section view, and a calculator.
What Drawing Information Do You Need Before Starting a Quantity Takeoff?
A takeoff built on missing data collapses halfway. Every quantity error I have traced came back to one skipped drawing check.
Before any takeoff, confirm five items on the drawings: the wall alignment on the plan view, the exposed height on the section view, the embedment depth, the corner and transition details, and the soil profile that decides the driving depth. If any item is missing, request the information before you calculate.
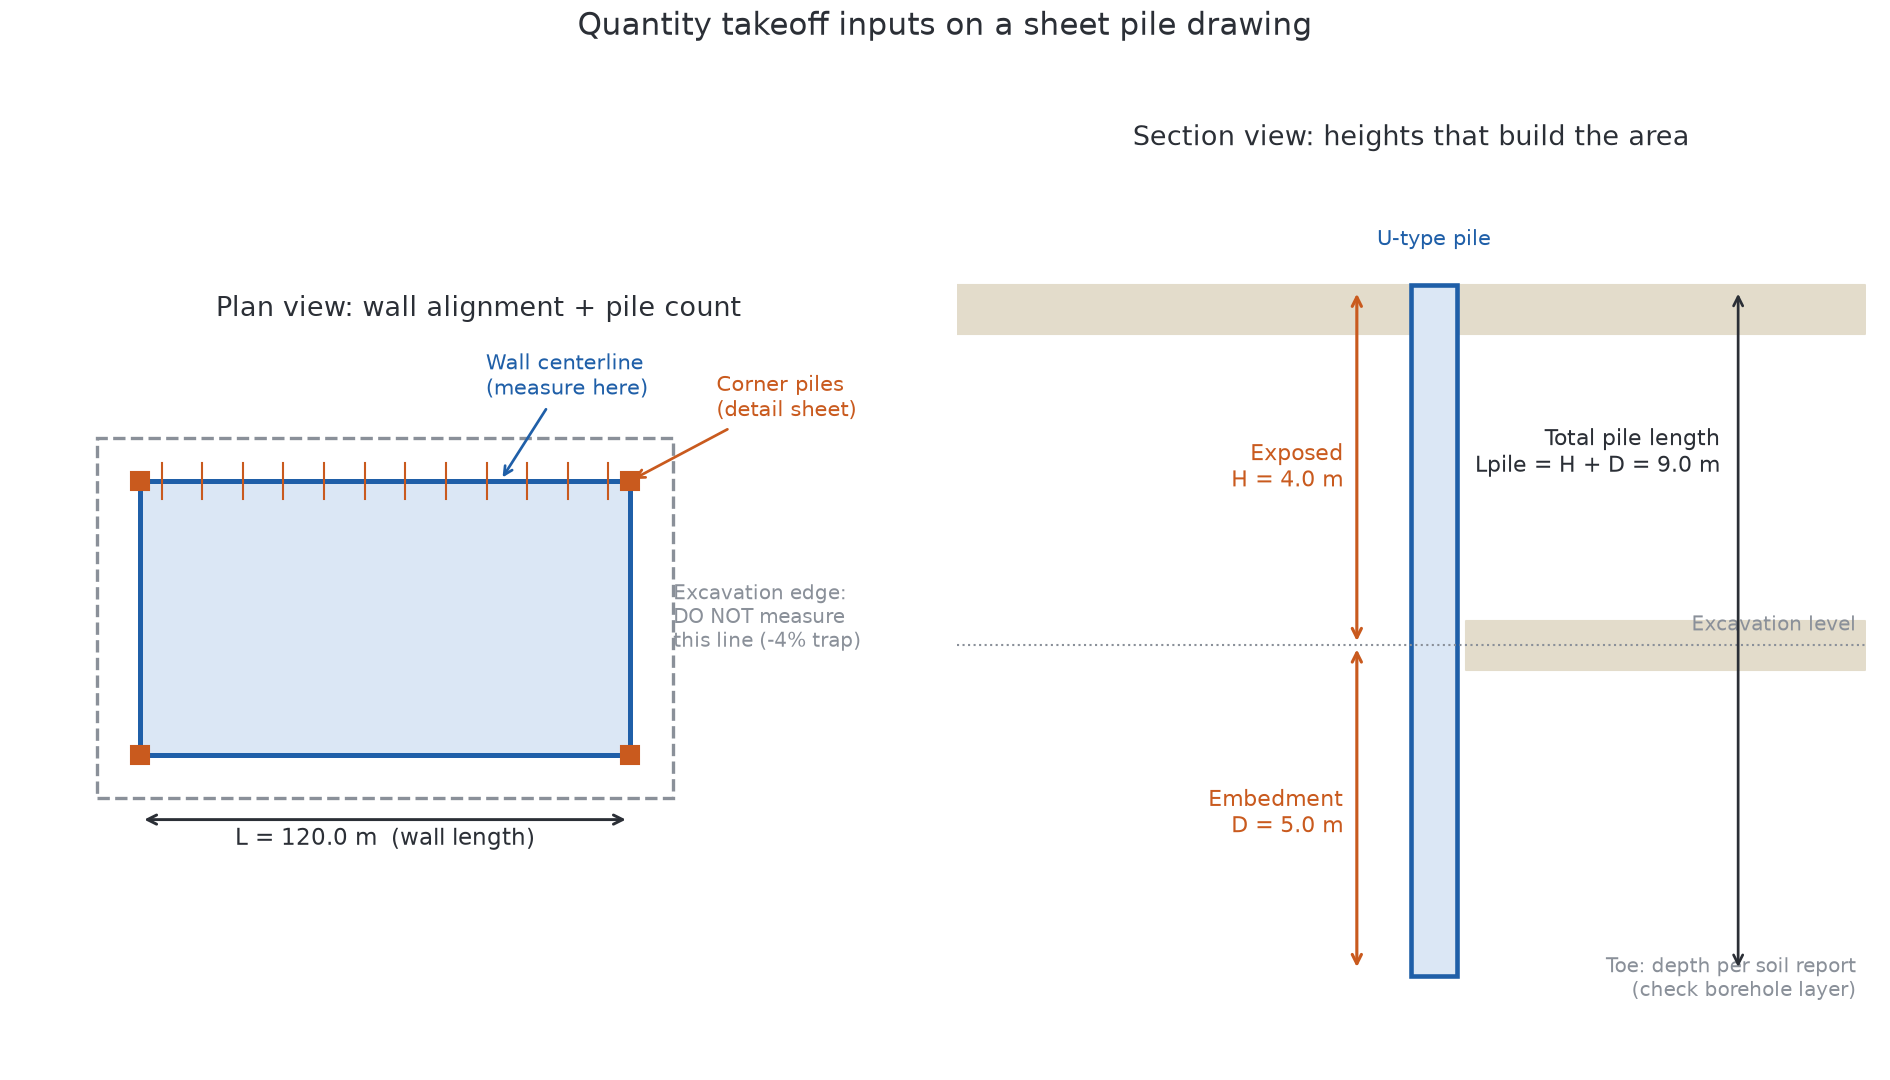
Where each quantity input lives on the drawing
Start with the plan view. On an href=”https://en.wikipedia.org/wiki/Engineering_drawing target=”_blank” rel=”noopener”>engineering drawing, the wall alignment is drawn as a line, usually with a centerline and station numbers. Measure this line, not the property boundary or the excavation edge. I have seen a 4 percent length error appear simply because someone measured the excavation edge, which cuts corners, instead of the wall centerline.
Next, open the section view. It shows two heights that matter. The exposed height runs from the excavation or dredge level up to the wall top. The embedment depth runs from the excavation level down to the pile toe. Both go into your area calculation. A typical temporary excavation wall might expose 4 metres and embed 5 metres. A riverbank wall might flip that ratio.
The corner and transition details are the most overlooked item. A rectangular excavation has four corners. Each corner needs corner sections or angled piles, and each corner adds length that a simple “excavation perimeter minus openings” number misses. Drawings often show a standard corner detail sheet with the corner pile geometry.
Finally, check the soil profile and the driving depth notes. The geotechnical section decides whether the designer extended the embedment into a dense layer. If the toe depth changes along the wall, split the wall into segments and calculate each one separately. Our team once quoted a port project where the toe depth stepped from 12 to 15 metres over three zones. A single average number would have under-ordered the deep zone by a full truckload.
| Drawing item | Where to find it | What it gives you |
|---|---|---|
| Wall alignment | Plan view, centerline with stations | True wall length for pile count |
| Exposed height | Section view, top to excavation level | Free-standing wall area |
| Embedment depth | Section view, excavation level to toe | Buried wall area and total pile length |
| Corner details | Detail sheets | Corner piles and extra wall length |
| Soil profile and toe notes | Geotechnical plan and sections | Segmented embedment depths |
Why incomplete drawings cost more than they save
Some clients send us only the excavation layout and ask for a price per ton. We can quote, but the quote carries a padding for unknowns. When we receive the full set, including sections and corner details, the same project often prices 5 to 8 percent lower because the quantity risk disappears. The takeoff inputs are not paperwork. They are the price. This is also the first thing we check when a client sends an RFQ, together with the specification documents we describe in our href=”https://cnsteelplant.com/how-to-prepare-a-complete-rfq-for-a-large-steel-sheet-pile-project/”RFQ preparation guide.
How Do You Convert Wall Length into the Number of Piles?
The pile count drives the delivery plan, the driving schedule, and the invoice. It is the number site teams argue about most, and it is the easiest to get right with one formula.
Divide the measured wall length by the nominal width of the pile profile to get the pile count. For a 120 metre wall in a 600 mm wide U-type profile, the count is 200 piles. Round up, check the last panel for a partial pile, and confirm whether corners replace standard piles at each intersection.
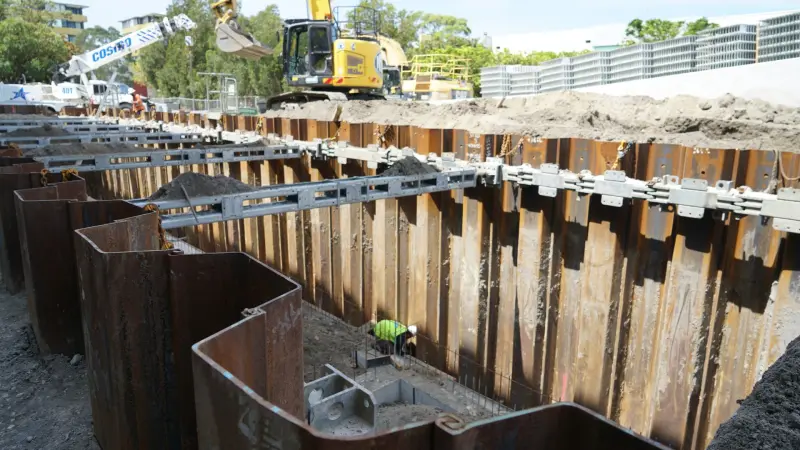
The counting method, step by step
Measure the total wall length from the plan view. Then read the nominal width of the chosen profile from the mill data sheet. A hot rolled U-type pile in a common 600 mm series has a nominal width of 600 mm. A Z-type pile often carries a 700 or 750 mm width. The interlock overlap is already included in the nominal width, so do not subtract anything extra. This is a point buyers frequently overcomplicate.
Divide length by width. For 120 metres and 0.6 metres, the answer is exactly 200 piles. Real walls rarely divide this cleanly. If the length is 121 metres, the count becomes 201.67, which you round to 202. The last panel still closes because the final interlock laps into the starter pile. I still review every rounding case manually, because a wall that misses by one pile can leave a 600 mm open panel at the closing point.
Corners change the count. At each corner, the drawing detail may call for one or two corner piles, fabricated from standard sections by welding or by pressing a special bend. Subtract the corner piles from the standard count if the corner length is measured along the wall line, or add them if the detail extends the line. Write the rule you used on your takeoff sheet, so the mill and the site crew follow the same logic. When the wall is long, we also recommend planning the driving sequence around the panel layout, which connects to the installation method choices we cover in our href=”https://cnsteelplant.com/steel-sheet-pile-installation-methods-vibratory-vs-impact-driving/”installation methods article.
A worked example you can copy
| Takeoff step | Value | Note |
|---|---|---|
| Wall length (plan view) | 120.0 m | Measured along centerline |
| Profile nominal width | 0.600 m | U-type, 600 mm series |
| Pile count | 120.0 / 0.6 = 200 pcs | Exact division |
| Corners (4 corners × 2 corner piles) | −8 standard, +8 corner | Per detail sheet |
| Standard piles to order | 192 pcs | Plus wastage, see below |
| Corner piles to order | 8 pcs | Fabricated from standard sections |
How Do You Turn Wall Area into Weight and Tonnage?
Steel mills and forwarders sell tonnage, not pieces. The conversion from pieces to tons is where currency, freight, and customs values are all decided.
Multiply the total wall area by the profile weight per square metre. Wall area equals exposed height plus embedment depth, times wall length. For example, 120 metres × (4 m + 5 m) × 150 kg/m² gives 162 tonnes. The weight per square metre comes from the mill data sheet, never from a general online chart.
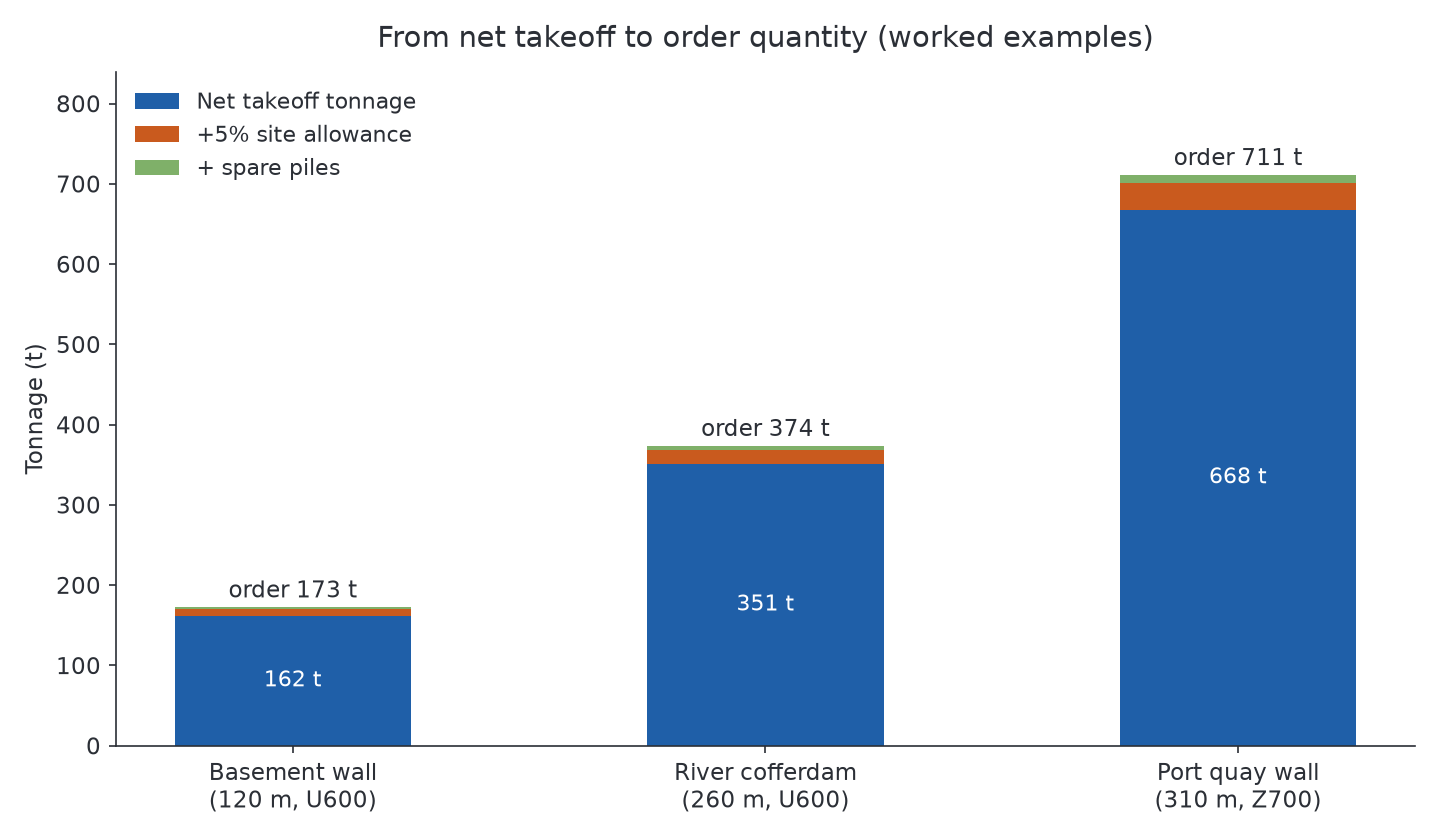
From area to tonnage without rounding errors
The formula is simple, but the inputs need care. The weight per square metre is a profile property. It equals the pile’s mass per metre of wall divided by its nominal width. Take a U-type section with a mass of 90.0 kg per metre of wall and a width of 0.600 m. The area weight is 90.0 / 0.6 = 150 kg/m². Multiply the full wall area, exposed plus embedded, by this figure. For our example wall: 120 m × 9 m = 1080 m², and 1080 × 150 kg/m² = 162,000 kg, or 162 tonnes.
Check the density assumption behind the data sheet. Standard structural steel uses 7850 kg/m³, and the published mass figures already reflect it. If a client compares our quote against another supplier’s and sees a tonnage gap, the gap almost always comes from a different profile or a different mass table, not from the math. The href=”https://en.wikipedia.org/wiki/Density target=”_blank” rel=”noopener”>density of steel is fixed, so mass differences mean geometry differences.
Different profiles change the tonnage sharply for the same wall. A heavier Z-type section with 205 kg/m² would push the same wall to 221 tonnes. That is why we ask clients to lock the profile before we quote, and why our article on href=”https://cnsteelplant.com/how-does-sheet-pile-wall-height-affect-section-selection-and-structural-design/”section selection by wall height matters for budgeting. The profile choice is a cost decision as much as a structural one.
Reference table for common profiles
| Profile type | Nominal width | Mass per m of wall | Mass per m² of wall |
|---|---|---|---|
| U-type 600 series (light) | 600 mm | 74.4 kg/m | 124 kg/m² |
| U-type 600 series (medium) | 600 mm | 90.0 kg/m | 150 kg/m² |
| Z-type 700 series | 700 mm | 122.5 kg/m | 175 kg/m² |
| Z-type 750 series (heavy) | 750 mm | 153.8 kg/m | 205 kg/m² |
Indicative figures for takeoff practice. Always confirm against the mill data sheet of the exact section before ordering.
How Much Extra Should You Add for Wastage and Site Conditions?
The net tonnage from your takeoff is not the order tonnage. Sites are not laboratories, and walls are not drawn perfectly.
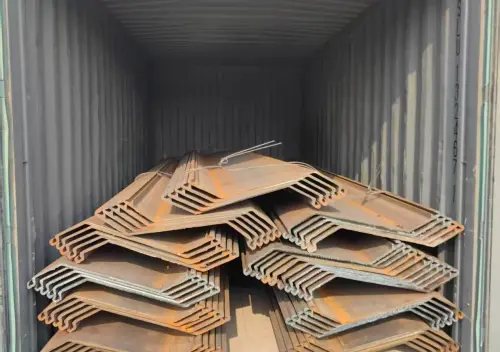
Add 3 to 5 percent to the net pile count for cutting losses, driving damage, and drawing changes. Add corner piles as a separate line, add one to two spare standard piles per 100, and split the order into segments when the project phases are known. This converts a theoretical takeoff into a realistic order.
What actually consumes the extra piles
Cutting is the first consumer. Walls close at odd lengths, and the last panel often needs a partial pile. Cutting a pile at the wall end sacrifices a full interlock, so crews prefer to trim a standard pile and drive the offcut elsewhere on site. Driving damage is the second consumer. A pile that refuses on an obstruction and deforms at the clutch leaves the wall, and the panel must be filled. Drawing changes are the third. A trench shifts by two metres, and your 200-pile wall becomes 204.
My rule for a clean site with soft to medium soil is 3 percent. For a site with gravel, cobbles, or old foundations, I use 5 percent, and I say so in the quote. For permanent walls with strict material certificates, I also add one spare pile per 100 so the site can replace any section that fails inspection without new production quietly inflating the href=”https://cnsteelplant.com/what-hidden-costs-should-buyers-include-in-a-steel-sheet-pile-budget/”hidden project costs. The spare rides the same container, so its freight cost is nearly zero.
Phased projects deserve a separate note. If the contractor builds the wall in three stages over six months, an unbalanced order strands tonnage at the wrong stage. We plan split shipments against the driving schedule instead of shipping everything at once, which is exactly the logic in our href=”https://cnsteelplant.com/packaging-loading-and-transportation-of-steel-sheet-piles/”packaging and transportation guide. The extra allowance does not replace href=”https://en.wikipedia.org/wiki/Scrap target=”_blank” rel=”noopener”>construction waste planning on site; it simply absorbs the normal friction between drawing and ground.
Wastage allowance by project type
| Project condition | Recommended extra | Reason |
|---|---|---|
| Soft to medium soil, straight walls | +3% | Cutting and minor clutch wear |
| Gravel, cobbles, possible obstructions | +5% | Refusal and deformation risk |
| Permanent wall, certified material | +1% + 1 spare / 100 pcs | Replacement without new production |
| Multi-phase project | Split shipments per stage | Match cash flow and site schedule |
Can You Cross-Check Your Takeoff Before Placing the Order?
A second pass takes thirty minutes and catches the errors that cost weeks. I never release a confirmed order without one.
Cross-check the takeoff with three independent tests: compare pile count against wall length again in reverse, compare tonnage against the drawing’s steel schedule if one exists, and compare the embedment depth against the soil report. If any two sources disagree by more than 2 percent, stop and resolve the difference before ordering.
The three cross-checks in practice
The reverse count is the fastest check. Multiply your pile count by the nominal width. It should return the wall length within one pile width. If 202 piles × 0.6 m gives 121.2 metres against a measured 121 metres, you are fine. If it returns 124 metres, someone measured the wrong line.
The steel schedule check needs a designer’s bar bending schedule or a pile schedule on the drawing set. Designers list lengths and counts per panel, in a format close to a href=”https://en.wikipedia.org/wiki/Bill_of_quantities target=”_blank” rel=”noopener”>bill of quantities. When their schedule and your takeoff differ, find out why before the order. Sometimes the designer already included a corner detail you missed. Sometimes the schedule is from an older drawing revision. Revision status is a silent killer on this check, so read the title block date on every sheet.
The soil report check protects the embedment depth. Compare the toe elevation on the section against the borehole logs. If the design toe sits in a layer that only one borehole confirms, ask the designer to confirm the toe is fixed, because a late toe extension adds pile length and tonnage after production may have started. For clients who want a deeper verification path, our href=”https://cnsteelplant.com/numerical-analysis-and-load-calculation-for-steel-sheet-piles/”load calculation article shows how the structural numbers tie back to the same soil data. When the checks pass, the tonnage on our quotation matches the site reality, and disputes at delivery simply do not happen. That consistency is also what our buyers evaluate when they href=”https://cnsteelplant.com/how-to-compare-steel-sheet-pile-quotations-beyond-price-per-ton/”compare quotations beyond price per ton.
| Cross-check | Method | Acceptable gap |
|---|---|---|
| Reverse pile count | Count × width vs measured length | ≤ 1 pile width |
| Steel schedule | Takeoff vs designer’s pile schedule | ≤ 2% |
| Toe depth vs boreholes | Section toe elevation vs soil report | Confirmed layer, no change |
My Take
I have quoted sheet pile walls for years, and the pattern never changes. Buyers who send complete drawings with sections and corner details get tighter prices and smoother deliveries. Buyers who send one layout plan and ask for “the price per ton” pay for the missing information later, through change orders and air-freighted spare piles. My advice is blunt: spend one hour doing the takeoff yourself with the four formulas in this article. You will understand your own project better than any spreadsheet someone sends you, and you will negotiate from numbers instead of guesses. In my factory-side view, the takeoff sheet is the cheapest engineering document on the project.
Conclusion
Measure the centerline, divide by pile width, convert area to tonnage with the data sheet figure, and add a 3 to 5 percent allowance. Then cross-check before you order.