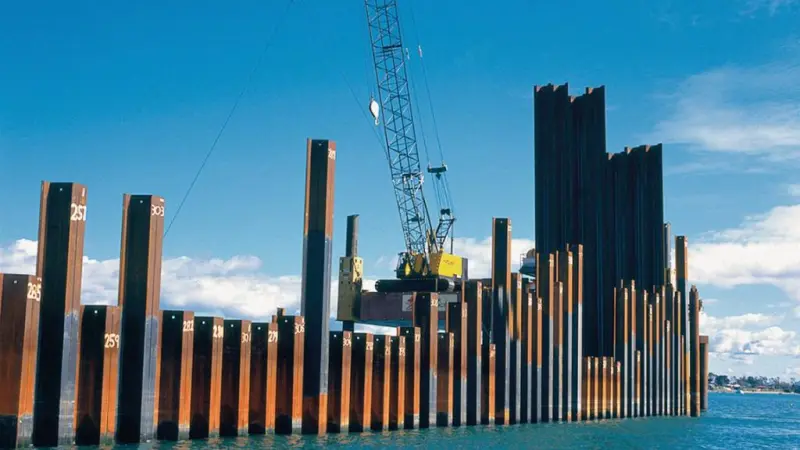
A sheet pile project can look simple on paper, but one wrong assumption about soil, equipment, or access can ruin the schedule before the first pile even goes into the ground.
Sheet pile installation can take anywhere from one day to several weeks, depending on pile length, soil conditions, wall length, equipment, access, and whether the wall is temporary or permanent. In many standard projects, a skilled contractor can install roughly 6 to 30 pairs of sheet piles per day, but real productivity always depends on the whole system, not just the crew speed.
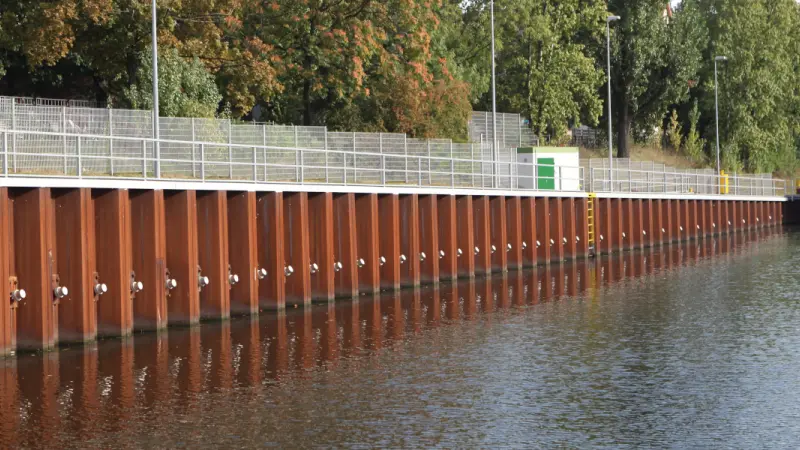
When a buyer asks me how long sheet pile installation takes, I never answer with one number right away. I first ask what type of wall they are building, how deep the piles need to go, what the soil looks like, what equipment the contractor plans to use, and whether the site is open or crowded. I also ask if the wall is for a temporary excavation, a riverbank protection job, a bridge foundation, or a permanent waterfront structure. I do that because installation speed is not only about driving steel into the ground. It is about how the whole job is organized from delivery to lifting, alignment, driving, and final checking.
In my experience, many delays in sheet pile work do not come from the steel itself. They come from poor planning around the steel. A contractor may have the right pile section but the wrong hammer. The soil report may be too basic. The access road may not allow a large rig to enter. The site may be next to existing buildings that limit noise and vibration, so the team must switch from a fast vibratory method to a slower press-in method. Sometimes the wall line looks simple in drawings, but the site has buried obstructions, old foundations, or utility conflicts that force the crew to stop and adjust.
I also think buyers often focus too much on the installation day and not enough on the preparation period. In real sheet piling work, the clock starts before the first pile is pitched. Delivery planning, crane setup, working platform preparation, guide frame positioning, and pile sequencing all affect how long the project will take. A wall that is only 60 meters long can still lose time if the piles are stacked badly, if the pile order is wrong, or if the rig has to keep repositioning in a tight space.
In this article, I will answer the time question from four angles. First, I will explain how sheet piles get installed, because installation method is the biggest driver of schedule. Then I will cover whether sheet piles get removed, because removal work affects total project duration in temporary jobs. After that, I will talk about whether sheet piles are temporary, since temporary and permanent walls are planned very differently. Last, I will explain whether sheet piles are watertight, because water control often changes both the installation method and the pace of work. I will also add my own view throughout, because I think timing discussions are only useful when they are tied to real site decisions.
How do sheet piles get installed?
A sheet pile schedule can fall apart fast when the team chooses the wrong installation method for the soil, depth, or site limits.
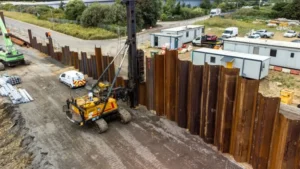
Sheet piles are usually installed by lifting each pile into position, interlocking it with the previous pile, aligning it with a guide frame, and then driving or pressing it into the ground using a vibratory hammer, impact hammer, or hydraulic press. In my experience, the installation method is the single biggest factor behind project speed because it affects alignment, noise, vibration, depth control, and how easily the crew can keep the wall moving forward.
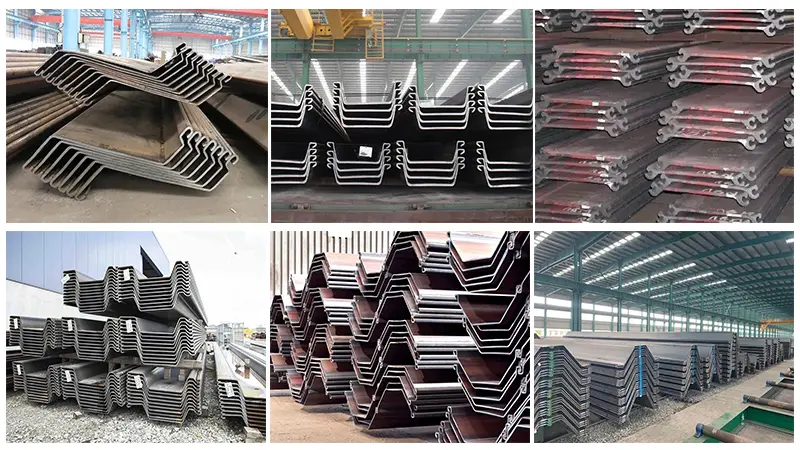
I always start with the installation sequence, not the installation machine
When people talk about installation, they often jump straight to the hammer. I understand why. The hammer is the most visible part of the job. But I do not think that is the best place to start. I prefer to think about sheet pile installation as a sequence of linked steps. If one step is weak, the whole schedule suffers. In a normal project, I break the work into six parts:
- site preparation and pile delivery
- unloading and stacking the sheet piles
- setting the guide frame or alignment line
- lifting and pitching the pile into position
- interlocking and driving or pressing the pile
- checking line, level, and verticality before moving on
This sounds basic, but it matters because speed comes from flow. If the crane has to wait for piles to be separated, or the rig has to stop because the guide frame is not stable, or the crew has to correct pile lean every few sheets, the daily output drops very quickly.
The three main installation methods I see in real projects
According to ArcelorMittal’s sheet pile installation guidance, the standard installation techniques are vibratory hammers, impact hammers, and hydraulic presses. I see the same in the market. sheet pile installation guidance
1. Vibratory driving
This is one of the most common methods for steel sheet piles. The vibratory hammer clamps onto the pile and uses vibration to reduce friction between the pile and the surrounding soil. In many sands and gravels, this method is fast and practical. It is often the first choice when the contractor wants speed and the surrounding area can accept some noise and vibration.
I have seen vibratory driving work very well on riverbank protection, trench support, and temporary retaining jobs where access is reasonable and the soil is not extremely dense. In many cases, it gives the best balance between speed and cost.
Still, I do not think “vibratory” automatically means “easy.” The clamp force, pile length, soil density, and guide control all matter. ArcelorMittal’s installation guideline notes that installation is possible with standard methods like vibrating, impact hammering, and pressing, but it also stresses that the whole system must match the soil and pile conditions. I fully agree with that. A fast hammer cannot rescue a bad setup.
2. Impact hammer driving
An impact hammer is often used when the soil is dense, when the pile must reach a more difficult final depth, or when the vibratory hammer alone is not enough. I usually think of this method as more forceful and sometimes slower in practical site rhythm, but more capable in difficult ground.
In some projects, the team starts with vibratory driving to move the pile through upper layers quickly and then finishes the last part with an impact hammer. This combined approach can save time when the upper soil is workable but the lower layer is much stiffer.
3. Hydraulic press-in
A hydraulic press pushes the sheet piles into the ground instead of driving them with repeated impact or vibration. This method is very useful near sensitive buildings, railways, hospitals, or dense urban areas where noise and vibration limits are strict. GIKEN’s press-in procedure shows how the machine advances pile by pile using previously installed piles for reaction. press-in procedure
I like press-in systems for sensitive sites, but I am careful about promising fast output without understanding the project. In some cases, a press-in system can move efficiently. In others, it is chosen because the site has no tolerance for vibration, not because it is the fastest option. So if a client asks me for a schedule, I always ask whether the project is speed-driven or restriction-driven.
The basic installation workflow I usually explain to buyers
Step 1: Prepare the working platform
The contractor must prepare access, crane position, pile storage, and a stable working area. If the platform is weak or congested, installation slows down before it starts.
Step 2: Deliver and sort the piles
The piles should be stacked in the right order, especially if different lengths or special corner piles are involved. A bad storage layout can waste hours.
Step 3: Set the guide frame or control line
For permanent walls, tight tolerances, or sealed interlocks, I strongly prefer a proper guide system. It reduces cumulative alignment errors.
Step 4: Pitch the first pile
The first few piles matter a lot because they set the wall line. If the first piles lean or drift, the correction work later can be slow and frustrating.
Step 5: Interlock the next pile and drive it
The next pile is threaded into the previous pile’s interlock and then driven or pressed down. This continues one by one, or sometimes in panels depending on the method and design.
Step 6: Check verticality and line regularly
I do not like waiting until the wall is finished to discover alignment problems. Small checks during installation are faster than major corrections later.
What really controls installation speed on site?
I have found that these factors matter most:
| Factor | Why it changes installation time | My practical view |
|---|---|---|
| Soil conditions | Dense soils, obstructions, and mixed ground slow penetration | Soil can change the schedule more than the steel can |
| Pile length and section | Longer and heavier piles take more handling time and more driving effort | Deep walls need better planning and stronger equipment |
| Installation method | Vibratory, impact, and press-in methods move at different rates | Method choice is often the biggest schedule decision |
| Site access | Tight urban sites slow delivery, crane movement, and pile handling | Easy access often saves more time than people expect |
| Wall tolerance and watertightness needs | Sealed walls and strict alignment usually need more control | Permanent walls are often slower than simple temporary walls |
| Crew experience | A good crew keeps flow, alignment, and troubleshooting under control | Experience shows up directly in daily output |
My own view: sheet pile installation speed is really a planning problem disguised as a production problem
I know contractors like to talk about how many piles they can drive per day. That number matters, but I do not think it tells the whole story. In my opinion, the most important schedule question is not “How fast can your hammer run?” It is “How many times will your crew have to stop?” Every stop hurts productivity. Stops happen because of access, obstructions, wrong pile sequence, equipment mismatch, poor alignment control, or weak communication between supplier, engineer, and contractor. That is why, when I help clients think about delivery and production timing, I spend almost as much time on preparation and method as on the steel itself.
Do sheet piles get removed?
Some buyers assume sheet pile work ends when the wall is installed, but in many temporary projects the removal stage is a second operation that needs its own time, equipment, and risk control.
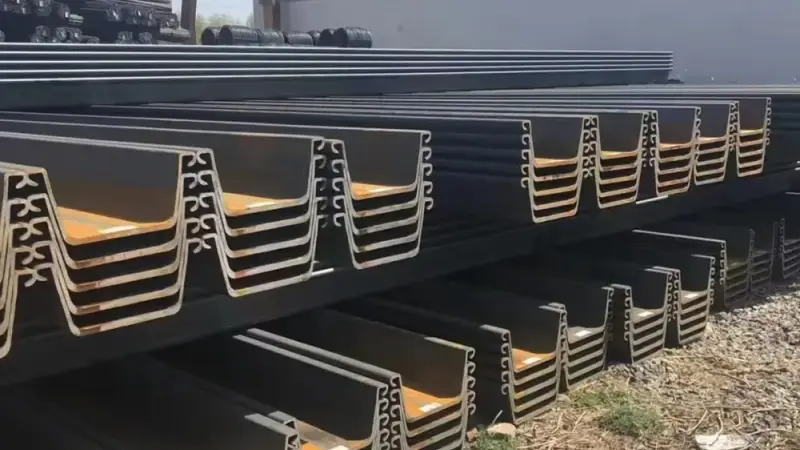
Yes, sheet piles often get removed when they are used for temporary works such as excavation support, trench protection, or temporary cofferdams. They can be extracted with vibratory equipment or other pulling systems after the permanent structure is complete. In my experience, removal can be faster than installation in some projects, but it should never be treated as an afterthought because extraction loads, soil grip, site access, and pile condition all affect the real timeline.
!
I separate “installation duration” from “project duration”
When a client asks, “How long does sheet pile installation take?” I often ask a follow-up question: Do you only mean the time to install the wall, or do you mean the total sheet pile phase of the project? Those are not always the same thing.
If the wall is temporary, the contractor may install the piles, complete the excavation or structure work behind them, and then come back weeks or months later to remove the piles. So the installation duration may be short, but the full sheet piling scope lasts much longer.
That is why I do not like giving a schedule answer without knowing whether the wall stays in the ground or comes back out.
When are sheet piles removed?
I most often see removal in these cases:
- temporary excavation support
- pipeline trench support
- bridge pier or abutment temporary works
- cofferdams for short-term water control
- temporary flood or access works
- rental sheet pile systems used for short projects
ArcelorMittal’s information on temporary sheet pile applications makes a point I agree with very much: steel sheet piles can be installed, extracted, and reused many times, which is one reason they are attractive for temporary works.
How are sheet piles removed?
The removal method usually depends on how they were installed, how deep they are, how tightly they are locked by the soil, and whether the surrounding structure can tolerate vibration.
1. Vibratory extraction
This is one of the most common methods. The vibratory hammer clamps onto the pile and uses vibration to reduce the soil grip so the pile can be pulled upward. If the piles were installed in granular soil and have not been left in place for too long, this can be a practical method.
2. Pulling with a crane and extraction setup
In some jobs, a pulling arrangement is used, sometimes together with vibration or other assistance. The key issue is not only the pile weight but the extraction resistance. A pile that came down easily does not always come out easily.
3. Press or special low-vibration extraction
On sensitive sites, the contractor may need a more controlled method. This can be slower, but it protects nearby assets and reduces nuisance.
What makes removal slower than expected?
This is where I think many schedules become too optimistic. Removal looks simple in a program chart. In real life, several things can slow it down:
Soil lock and friction increase
A pile that has been in the ground for months may bond more strongly with the soil than expected. Clay adhesion, corrosion, and soil settlement can all increase resistance.
Damage at the pile head or interlocks
If the pile head is deformed, the clamp may not grip well. If interlocks are damaged, adjacent piles may not separate smoothly.
Nearby permanent works
Once a basement slab, pile cap, bridge element, or utility crossing is in place, the extraction equipment may have less room to operate.
Groundwater and wall movement concerns
Sometimes the piles are technically removable, but removing them too early can create soil movement or water issues around the completed works.
My removal planning checklist
| Removal issue | Why it matters | My recommendation |
|---|---|---|
| Temporary or permanent wall? | Determines whether extraction is even part of the scope | Confirm this at tender stage, not after installation |
| Soil type and embedment | Controls extraction resistance | Ask the contractor to assess extraction force, not just pile weight |
| Time in ground | Longer duration may increase friction and difficulty | Build removal risk into the program |
| Site access after main works | Later stages may block crane access | Reserve extraction access early in the plan |
| Reuse goal | A reusable pile needs cleaner extraction and better handling | Treat recovered piles as assets, not scrap |
My own view: removal deserves almost as much planning as installation
I say this because I have seen temporary jobs where the team planned the wall installation very carefully, but treated extraction as a minor closing task. Then the permanent works advanced, access tightened, the piles were harder to pull than expected, and the project lost time at the end instead of the beginning. From my side as a supplier, I always like to know whether the piles are temporary and intended for reuse. That changes how I think about section choice, condition, logistics, and the overall value of the material.
Are sheet piles temporary?
A lot of confusion around schedule comes from one simple point: some sheet pile walls are built to stay for decades, and some are built to leave after one stage of construction.
Sheet piles can be temporary or permanent. Temporary sheet piles are commonly used for excavation support, cofferdams, trench works, and short-term retaining systems, while permanent sheet piles are used for riverbank protection, port structures, flood control walls, basements, and long-life retaining structures. In my experience, the temporary-or-permanent decision changes not only the design but also the installation method, tolerance requirements, corrosion strategy, removal planning, and the total project timeline.
I think this is one of the most important questions in the whole project
When I talk to contractors or distributors, I often ask very early: Is this a temporary wall or a permanent wall? I ask because the answer affects almost everything else:
- the pile section choice
- whether used piles are acceptable
- whether corrosion allowance matters
- whether sealing is needed
- whether removal must be planned
- whether strict appearance and alignment control are required
- whether the contractor prioritizes speed, reuse, or long-term performance
A temporary wall and a permanent wall can both use steel sheet piles, but they do not behave like the same product in the project plan.
Temporary sheet pile walls
Temporary walls are usually there to support another construction activity. The sheet piles are not the final structure. They are part of the process. Common examples include:
- deep excavation support for basements
- temporary trench support for pipelines
- cofferdams for bridge or marine work
- temporary flood control or river diversion works
- temporary retaining during foundation construction
In these jobs, speed often matters a lot. The contractor wants the wall in place fast, the excavation secured, and the main work moving. Removal and reuse are usually part of the economic logic.
I like temporary sheet piling because it shows one of the best strengths of steel sheet piles: they can often be extracted and used again. For B2B buyers, that can change the cost picture of the whole project.
Permanent sheet pile walls
Permanent walls are different. In these projects, the sheet pile wall becomes part of the long-term structure. I often see permanent sheet piles used for:
- riverbank protection
- quay walls and port structures
- retaining walls for roads or industrial facilities
- basement perimeter walls
- bridge abutments and flood defense works
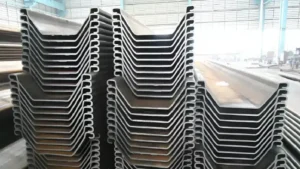
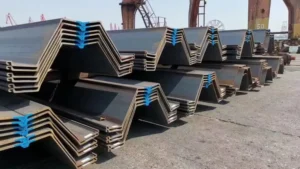
Our own Riverbank Protection Project in Southeast Asia is a good example. In that case, hot rolled U type steel sheet piles were used to form a retaining wall along the riverbank. The interlocking system provided structural continuity and water control, and the wall was designed as part of the long-term protection system, not as a short-term temporary measure. In projects like this, I care more about long-term durability, interlock performance, corrosion resistance, and stable installation tolerances than I do about future extraction.
How “temporary vs permanent” changes the schedule
Temporary walls often install faster, but the full scope may last longer
A temporary wall may use a simpler installation approach, looser visual tolerance, and a strong focus on speed. But if removal is included, the total sheet pile phase of the project becomes longer.
Permanent walls may need more controlled installation
If the wall must remain watertight, visually straight, structurally reliable, and durable for years, the contractor may spend more time on guide frames, interlock sealing, welding details, or corrosion protection planning.
Permanent works may face stricter environmental or structural checks
Urban basements, waterfront walls, and infrastructure jobs often require tighter monitoring for vibration, settlement, or adjacent structure movement.
My practical comparison table
| Topic | Temporary sheet piles | Permanent sheet piles |
|---|---|---|
| Main purpose | Support construction temporarily | Form part of final structure |
| Schedule priority | Fast installation and later removal | Controlled installation and long-term performance |
| Reuse value | Very important | Usually less important unless partial recovery is planned |
| Corrosion strategy | Often lighter, depending on project life | More important for long service life |
| Watertightness demands | Sometimes moderate only | Often higher if water retention is critical |
| Appearance and alignment | May be less strict | Often more controlled |
My own view: “temporary” does not mean “low importance”
This is a point I care about. Some people hear “temporary wall” and assume it can be treated casually. I do not agree. Temporary sheet pile walls are often holding back soil and groundwater next to workers, excavations, roads, or active structures. They may only stay in place for a few months, but during those months they are doing a very serious job. So even if a wall is temporary, I still want the right section, the right length, the right interlock performance, and the right installation method. A short service life does not reduce the consequence of failure.
Are sheet piles watertight?
A wall may go in quickly, but if the project also needs water control, the installation details become more demanding and that can change the pace of work.
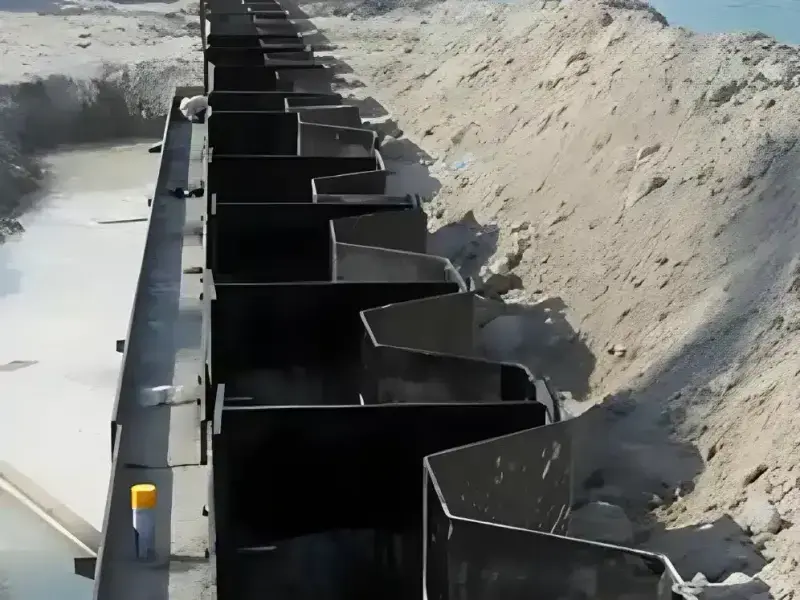
Sheet piles themselves are steel and therefore impermeable, but a sheet pile wall is not automatically fully watertight because water can pass through the interlocks between piles. In many temporary retaining jobs, the natural seepage resistance of the interlocks is enough. If a project needs higher water tightness, the contractor may use sealed interlocks, double walls, welded joints, or additional sealing systems, and those choices can affect both installation method and installation time.
I never answer “yes” or “no” without defining the water requirement
This is one of the most common sheet pile questions, and it is also one of the easiest to answer badly. If someone asks, “Are sheet piles watertight?” the simple answer is “not automatically.” But I think that answer is too short to be useful.
According to ArcelorMittal’s technical guidance on watertightness of sheet piles, the steel sheet pile section itself is impervious, and the main path for water infiltration is the interlock. I think that is the key point. The wall performance depends on the interlock condition, wall geometry, groundwater pressure, and whether extra sealing measures are added. watertightness of sheet piles
In real projects, I think about watertightness in three levels
1. Moderate seepage is acceptable
This is common in many temporary retaining walls or support works where the wall mainly holds soil and some limited seepage can be managed by pumping or dewatering. In these cases, standard interlocks may be enough.
2. Medium seepage resistance is required
This can apply to basements, bridge abutments, utility shafts, or groundwater control zones where the owner wants better performance. Here I start thinking about interlock sealants or a more controlled installation process.
3. High water resistance is required
For contaminated sites, water cut-off structures, marine works, or critical flood-control applications, the wall may need sealed interlocks, welded joints, double wall systems, or a combined water control strategy.
How watertightness affects installation time
This is where the schedule question comes back into the discussion.
Sealed interlocks need more care
If the interlocks are filled with a sealing product, the piles often need more careful handling and alignment so the seal is not damaged during driving. ArcelorMittal’s piling handbook explains that sealed sheet piles should be guided carefully and installed with tight control of verticality to protect the sealing product. AMCRPS Piling Handbook
Guide frames become more important
If the piles lean too much or interlocks bind, the seal can be compromised. That means the contractor may spend more time on guides, alignment, and installation sequence.
Panel driving may be preferred in some permanent works
For walls with stricter tolerances, the contractor may choose a more controlled installation method rather than the quickest possible one.
Troubleshooting costs time
If interlocks clog, seals are damaged, or the wall line drifts, fixing the problem later is much slower than preventing it during installation.
My watertightness planning table
| Water requirement | Typical wall use | Installation impact |
|---|---|---|
| Moderate seepage acceptable | Temporary retaining, some trench support | Fast standard installation often possible |
| Medium seepage resistance needed | Basements, bridge works, controlled excavations | Better guide control and possible sealant use |
| High water tightness required | Cut-off walls, flood control, sensitive marine or environmental works | Slower, more controlled installation with sealing systems |
My own view: watertightness is not a product-only question, it is a system question
I really believe this. People sometimes ask for a “watertight sheet pile” as if the answer sits only in the mill section drawing. In reality, water performance depends on the pile profile, the interlock, the sealant if used, the installation accuracy, the wall continuity, and the groundwater conditions. So if a client tells me water control is critical, I do not only think about which sheet pile to quote. I think about whether the project team is also planning the right installation method and tolerance control. A good product can still underperform if the installation process does not respect the water-tightness target.
What really decides how long sheet pile installation takes?
After answering the four questions above, I think the honest answer to the title becomes much clearer: sheet pile installation time is not one fixed number. It is the result of several decisions working together.
The daily production range I use as a rough reference
ArcelorMittal’s installation guidance notes that the execution speed of standard sheet piles can range roughly from 6 pairs to 30 pairs per day depending on ground conditions, pile length, and driving equipment. I think that is a useful reference range for planning conversations, but I would never use it as a guaranteed promise without checking the project details.
My own practical timing framework
If I had to explain installation duration to a buyer in a simple way, I would frame it like this:
Fast end of the range
A relatively open site, moderate pile lengths, workable soil, temporary wall, vibratory installation, simple alignment, and no major access restrictions.
Middle range
A normal commercial or civil project with average site limits, moderate to deep sheet piles, some groundwater management, and standard contractor equipment.
Slow end of the range
Dense or mixed soils, long piles, tight urban access, strict vibration limits, press-in installation, sealed interlocks, or a permanent wall with tight tolerances.
My full project timing checklist
Before I give any useful answer on schedule, I want to know:
- What is the wall length?
- What is the pile type and length?
- Is the wall temporary or permanent?
- What are the soil conditions?
- Is there rock, dense layers, or buried obstruction risk?
- What installation method will be used?
- Is the site urban, marine, or open ground?
- Are there noise or vibration restrictions?
- Is water tightness a major requirement?
- Will the piles be removed later?
- Is the contractor using panel driving, pitch-and-drive, or press-in sequence?
- How much space is available for cranes, storage, and delivery?
If I do not know these points, any schedule answer is only a rough guess.
Conclusion
For me, sheet pile installation time is never just about how fast the rig can drive steel. It is about method, soil, access, water control, and whether the wall is temporary or permanent.